
StarTools - Processing the Orion Nebula
9th April, 2020
ProcessingDSOImagingTraditional Processing
If the capture is the technically demanding half of the process of Astrophotography, then processing is the artistically/scientifically demanding other half that makes or breaks your final image.
Striking that balance is entirely up to you, whether you're going for as accurate a colour balance as possible, or taking a more artistic approach to bring out what you want from the image; every approach has its validity and merits. After all our eyes operate on one narrow band of the light spectrum and a narrowband image in the Hubble pallete is going to look drastically different to a capture in UV or IR light.
Commentary aside there are ususally two go to programs for Astrophotography image processing: Photoshop or PixInsight. Of course there are alternatives but these are by far the most popular. The unfortunate downside? They both require vastly different 'workflows' and hours of practice and fiddling to master.
StarTools
Sometimes you want things simpler, quicker, less excrutiating. You also don't want to lose out on the potential you could have achieved if you put in the time and effort in the first place. It's a case of the 'project triangle' rearing its head in the world of Astrophotography processing; time vs quality being the most obvious tradeoff you are considering evey step of the way, but cost as well is too a factor. PixInsight is no small outlay coming in at hundreds of your dollars/pounds and Photoshop's latest model of subscription costs can mount up over time.
Maybe there's a compromise or a balance somewhere in the middle, in a perfect world there should be and perhaps there is, perhaps not. It's a matter of personal perspective and needs after all; there are many right ways to do something in image processing.
For me this compromise is StarTools. It's a modern program designed to make image processing accessible, yet flexible with a focus on user experience and ease of use whilst still retaining depth of features and allowing you to tweak things at the smallest detail.
First Steps
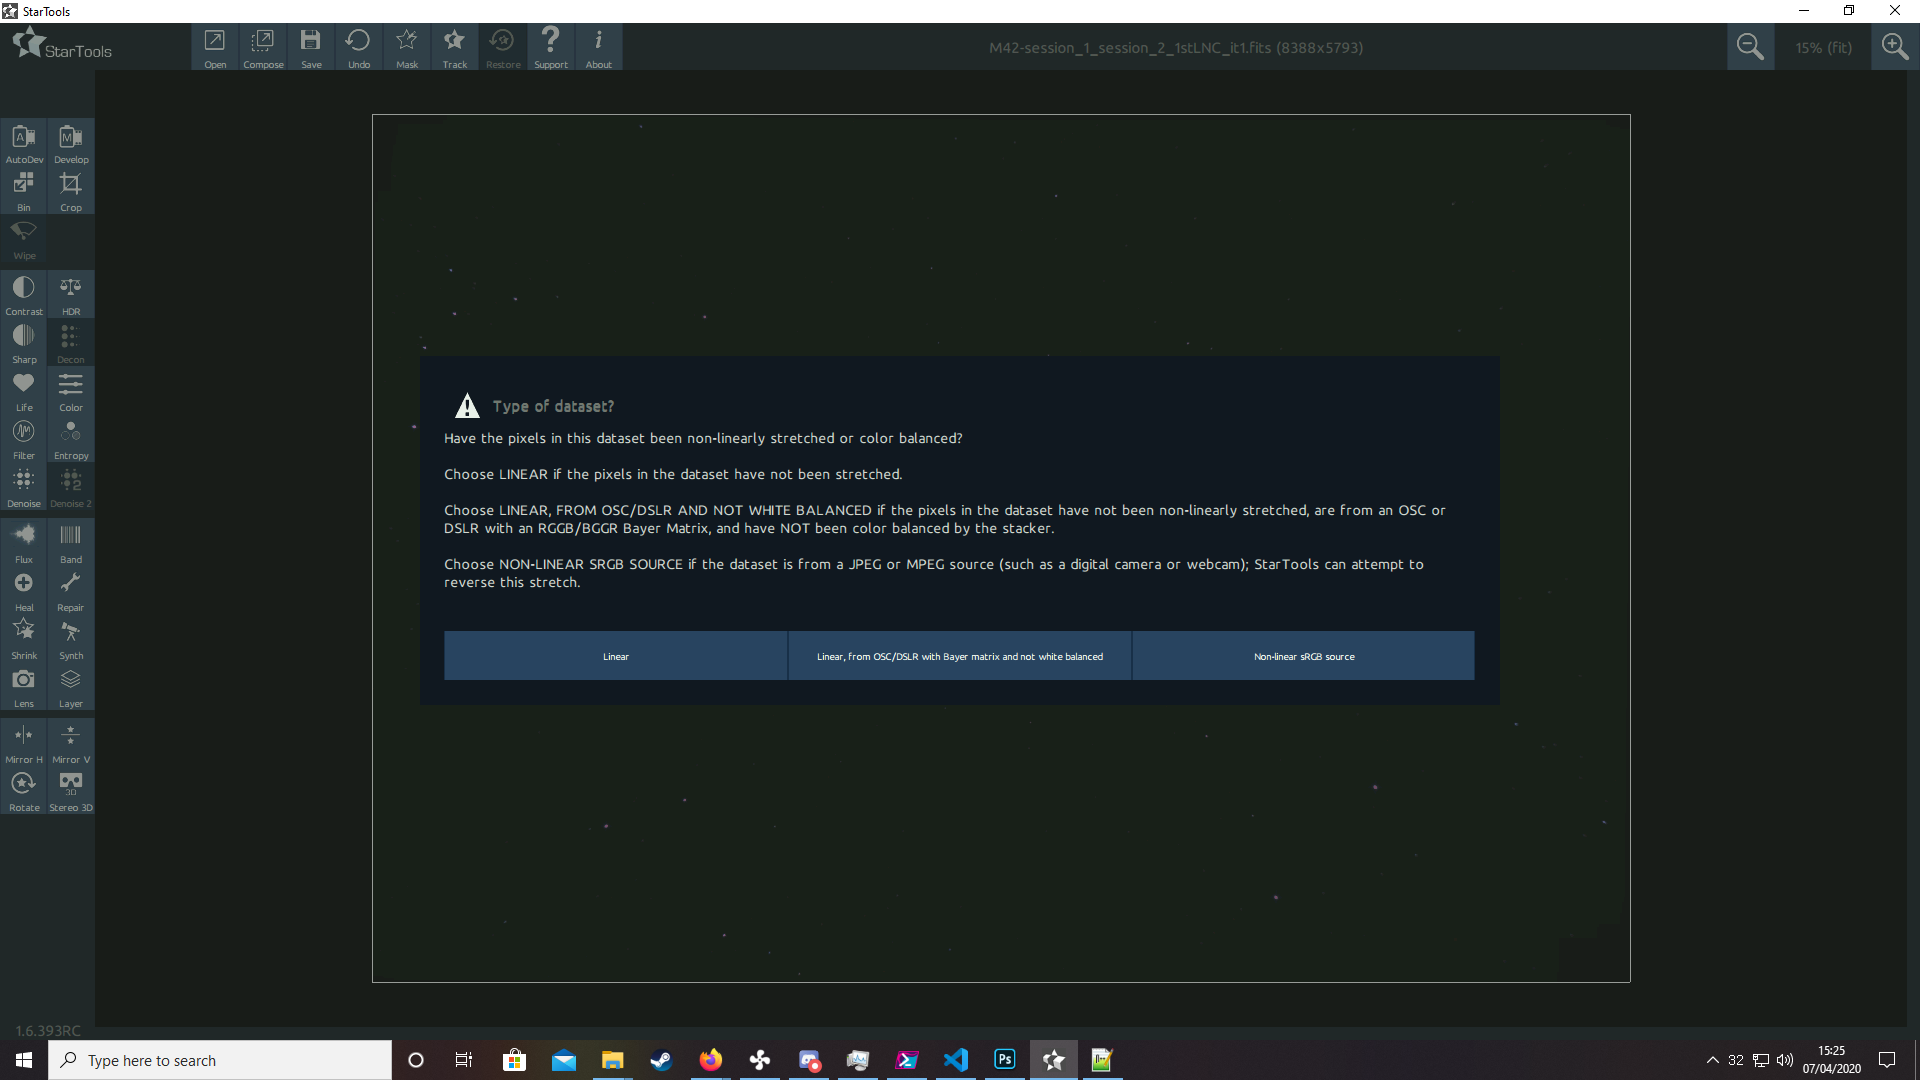
After stacking a typical DSLR image StarTools will want to know what it's dealing with upon opening the file. It's important that it know the source is a DSLR or One Shot Colour camera with a Bayer Matrix in order to approach the processing in the correct way. It's also important that the colour balance remains as is was from the RAW or FITS files straight from the camera.
Binning
In terms of StarTools, binning is a method for sacrificing resolution for increased noise reduction and increased signal to noise ratio. If the stacked data was Drizzled x2, then binning by 50% brings the resoltion back to that it was originally shot at with the camera. By doing this you have taken a potentially undersampled image with blocky stars and features, improved their shape and definition, then re-scaled the image back down into one with potentially more perceived final details.
Don't worry if you can't see anything in this step, you're just bringing the image down to its original scale and don't need to see anything.

AutoDev - The Initial Stretch
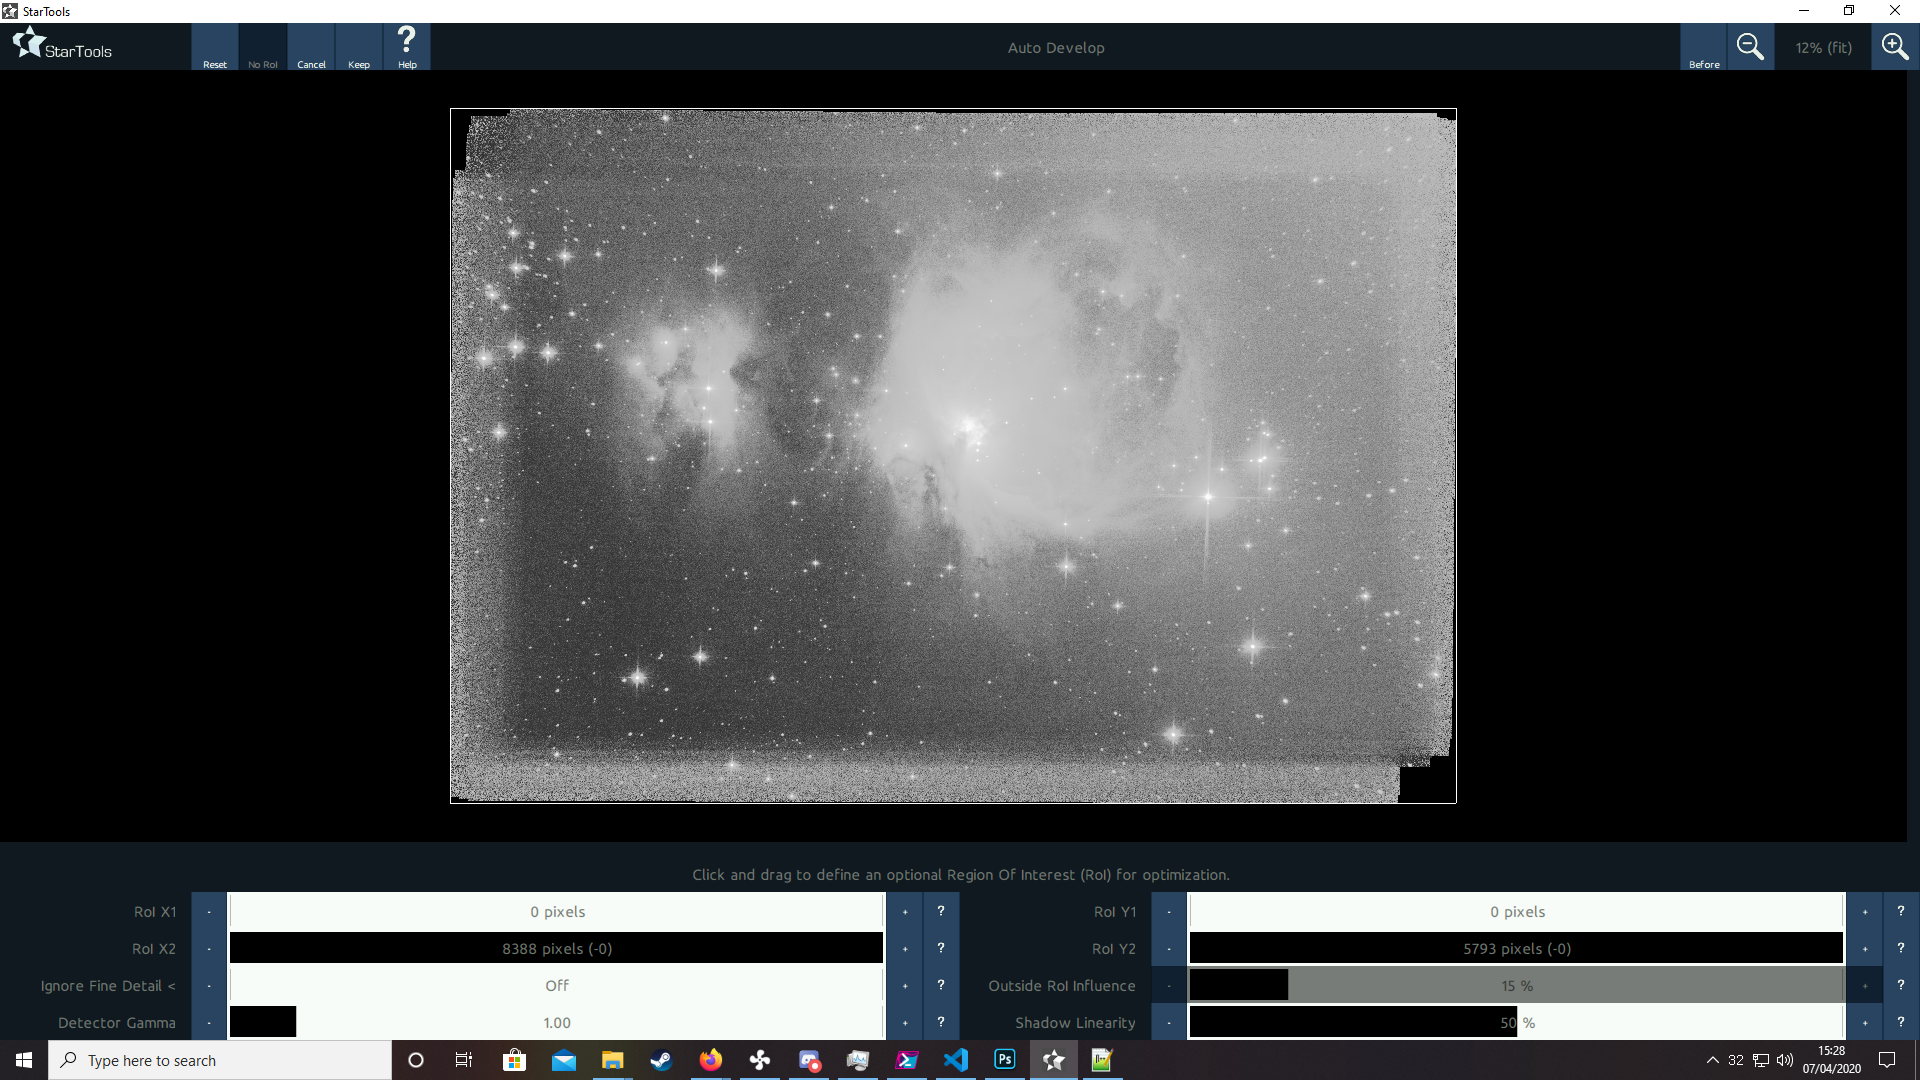
AutoDev is a simple and automatic stretch of the data based on the overall features of an image. At its defaul settings it brings eveything up to a uniform brightness including a lot of the noise, but that's all we need for now just to analyse and begin cropping and framing the image.
Crop
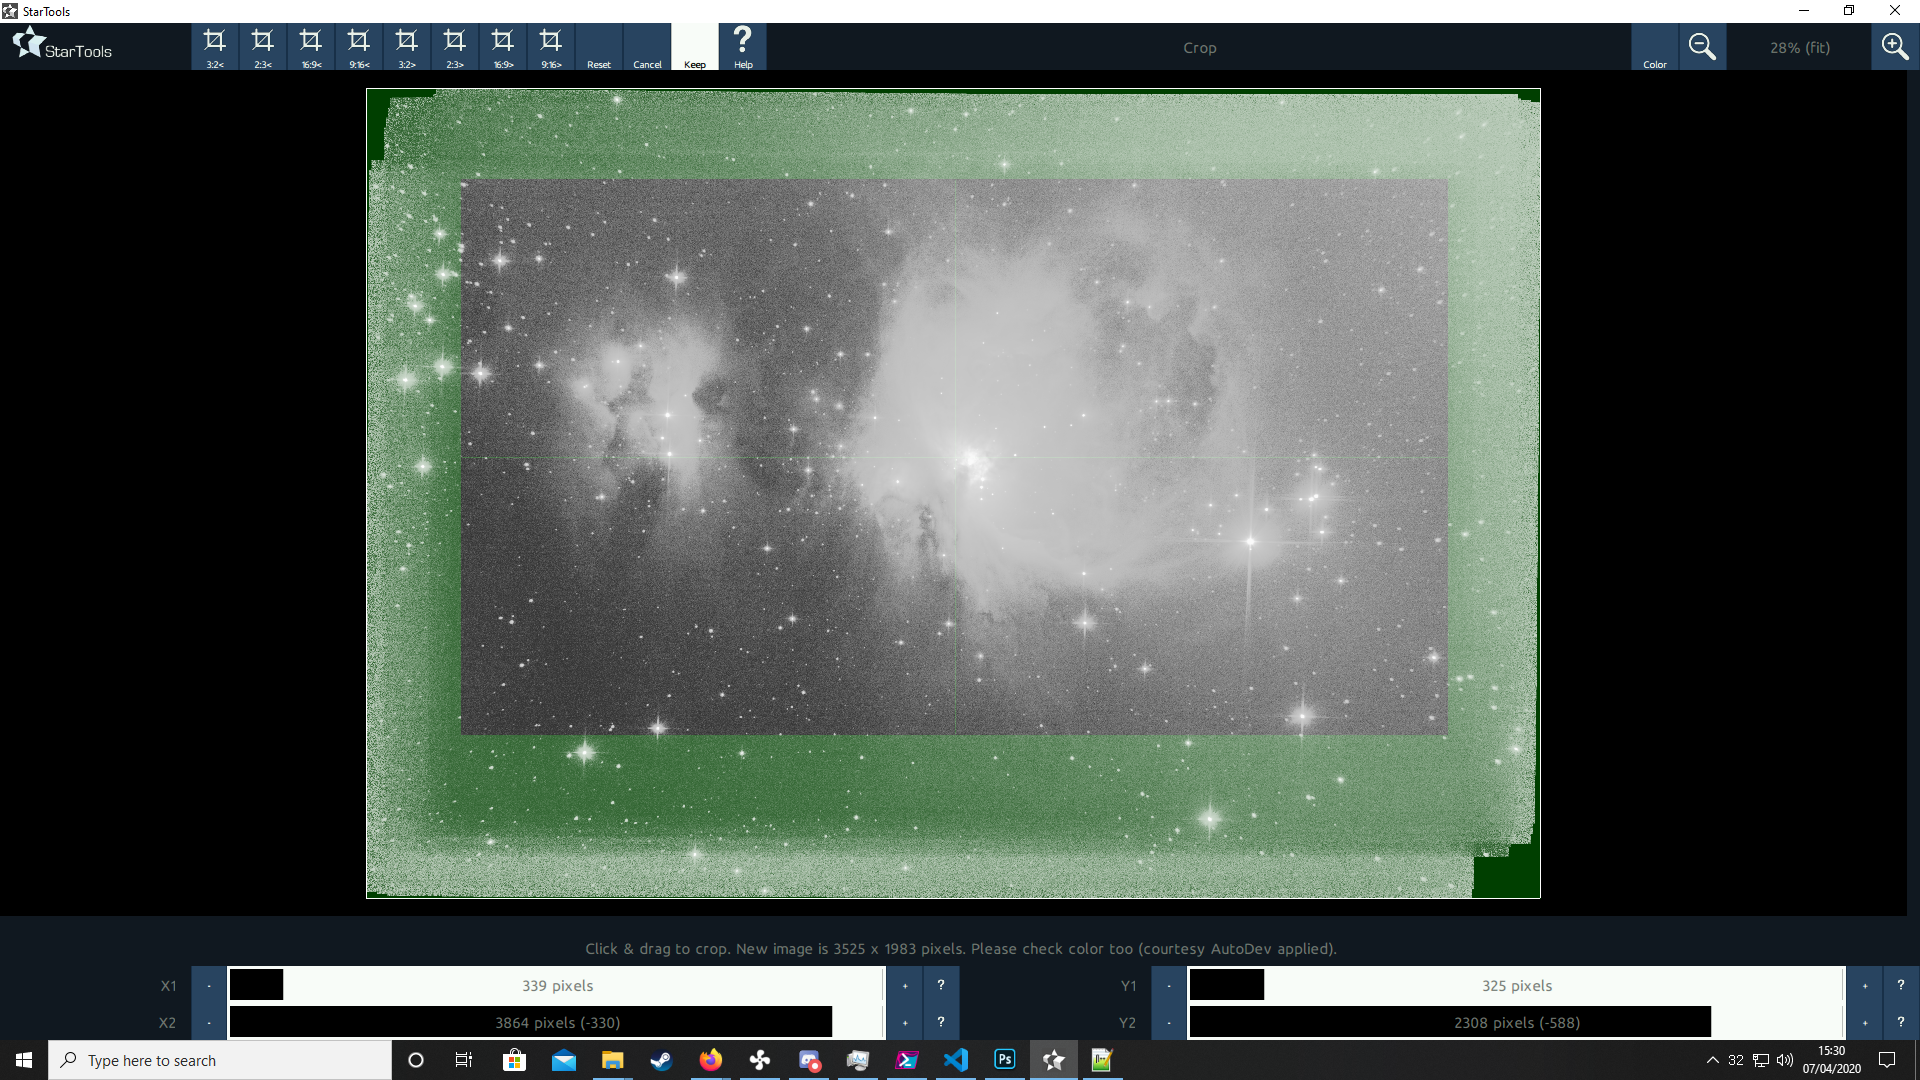
Cropping the stacked edges and creating an initial framing of the image is self expanatory, attention has to be paid to ensuring that all the stacking artefacts are removed for Wipe to work correctly in the next step.
Wipe
Wipe is the equivalent of 'background extraction' in other programs and has a few presets that cover most tasks: Gradient which removes sky and linear gradients often created by light pollution or similar, Vignetting which aims to remove vignettes from the image from optical effects of lenses, mirrors etc, and Ampt Glow which removes just that from affected images.
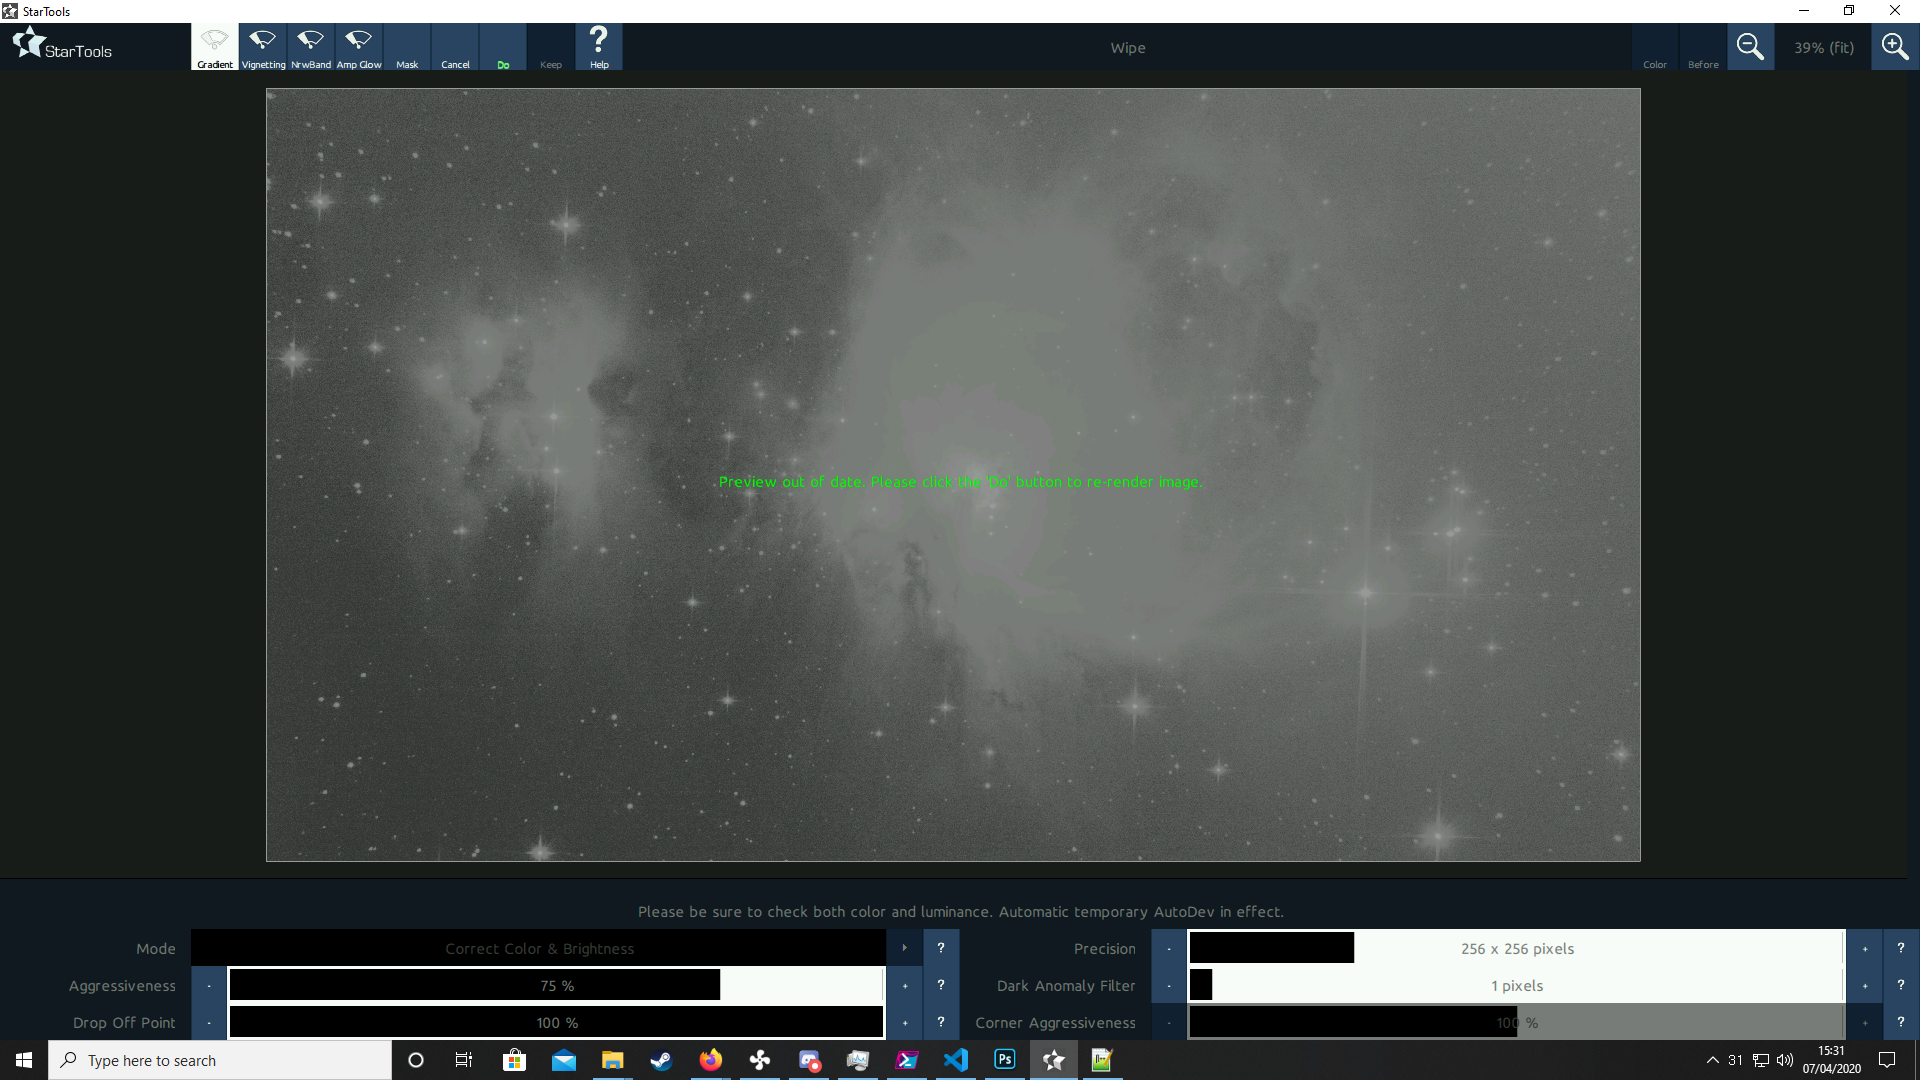
It might be beneficial to play with the settings such as Aggresiveness and Dark Anomaly Filter. Here Dark Anomaly Filter is set to 2 pixels to help filter out any residual influence of the debayer and stacking process that may have been left behind on a DSLR image.
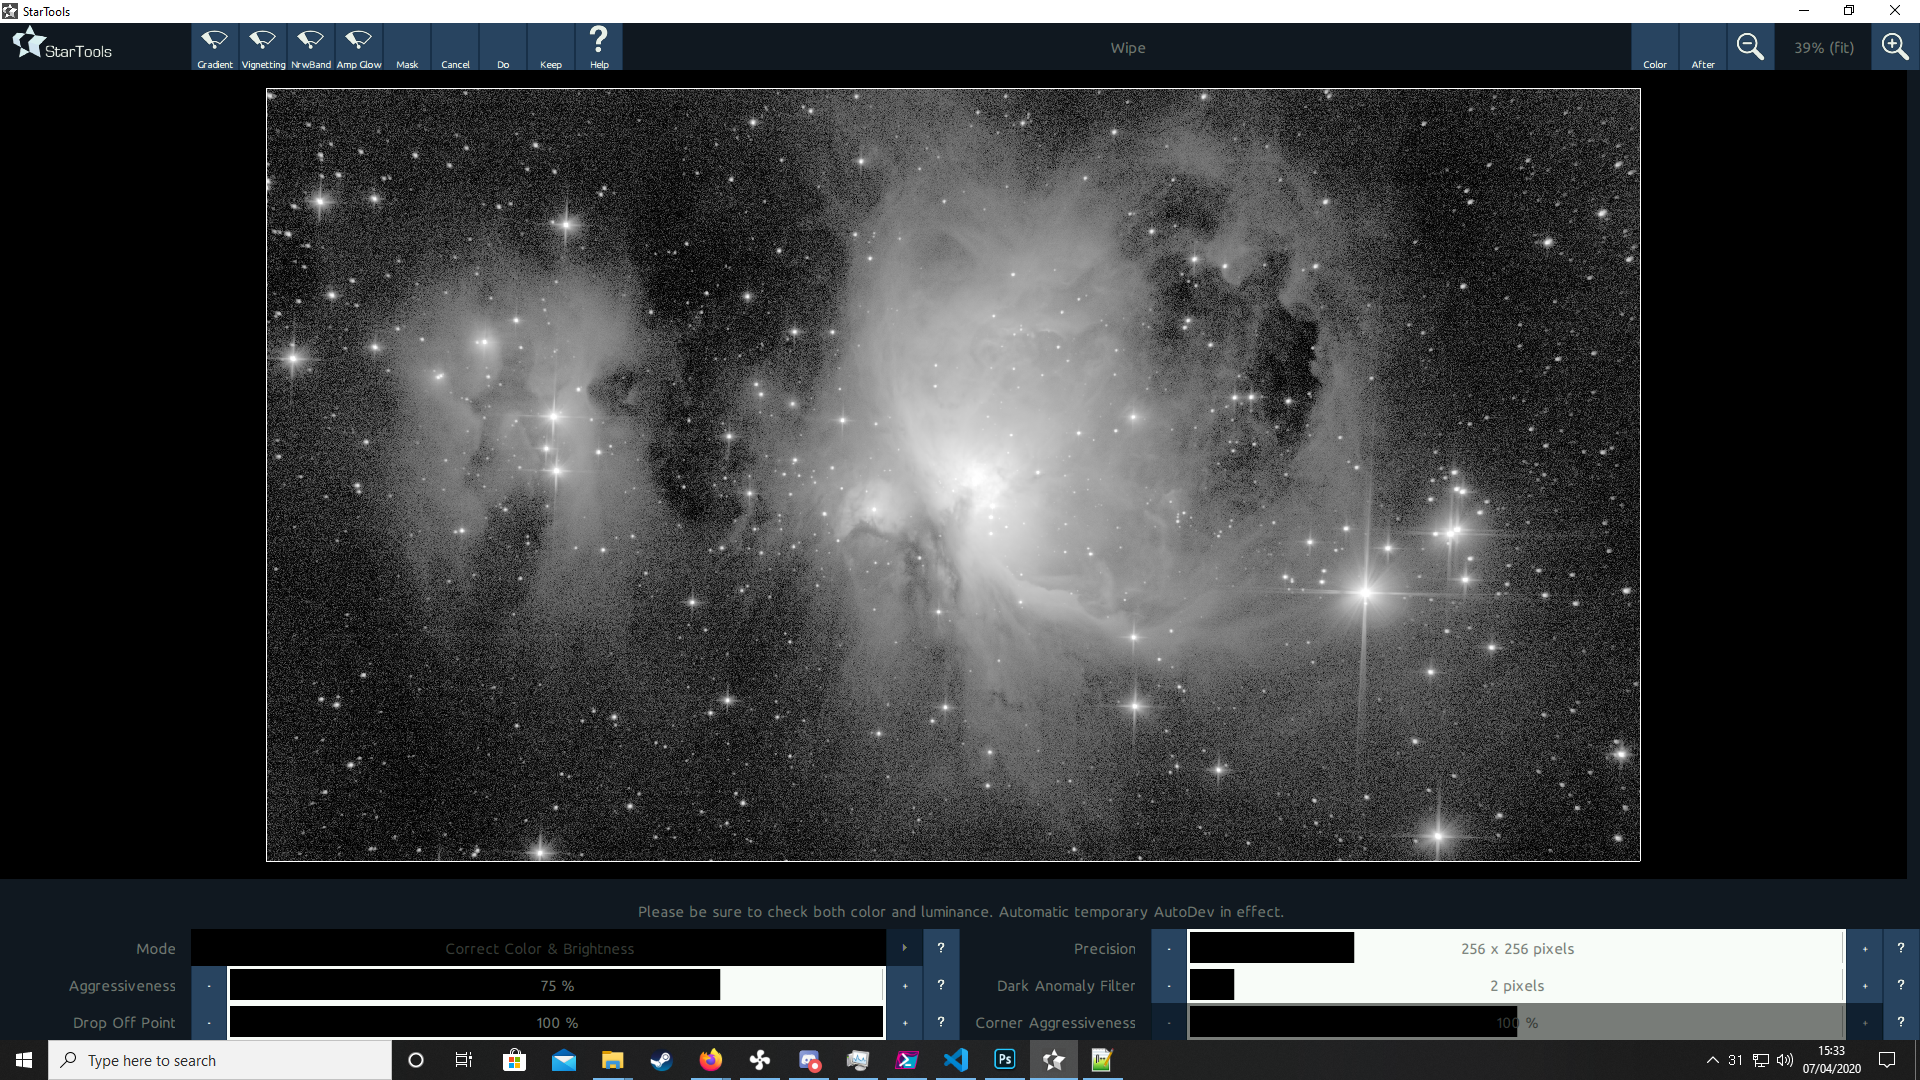
There will be increased background noise as a result of removing the gradients and a good portion of the green coolour channel in a DSLR/OSC image as a result of the Bayer Matrix consisting of twice the number of Green pixels (RGGB), this will be dealt with a second stretch next.
Final AutoDev
Running the AutoDev a second time after a wipe is essential to create the final stretch for the image. When entering the tool it's important to press 'Redo global stretch' so that the stretch is reset back to linear.
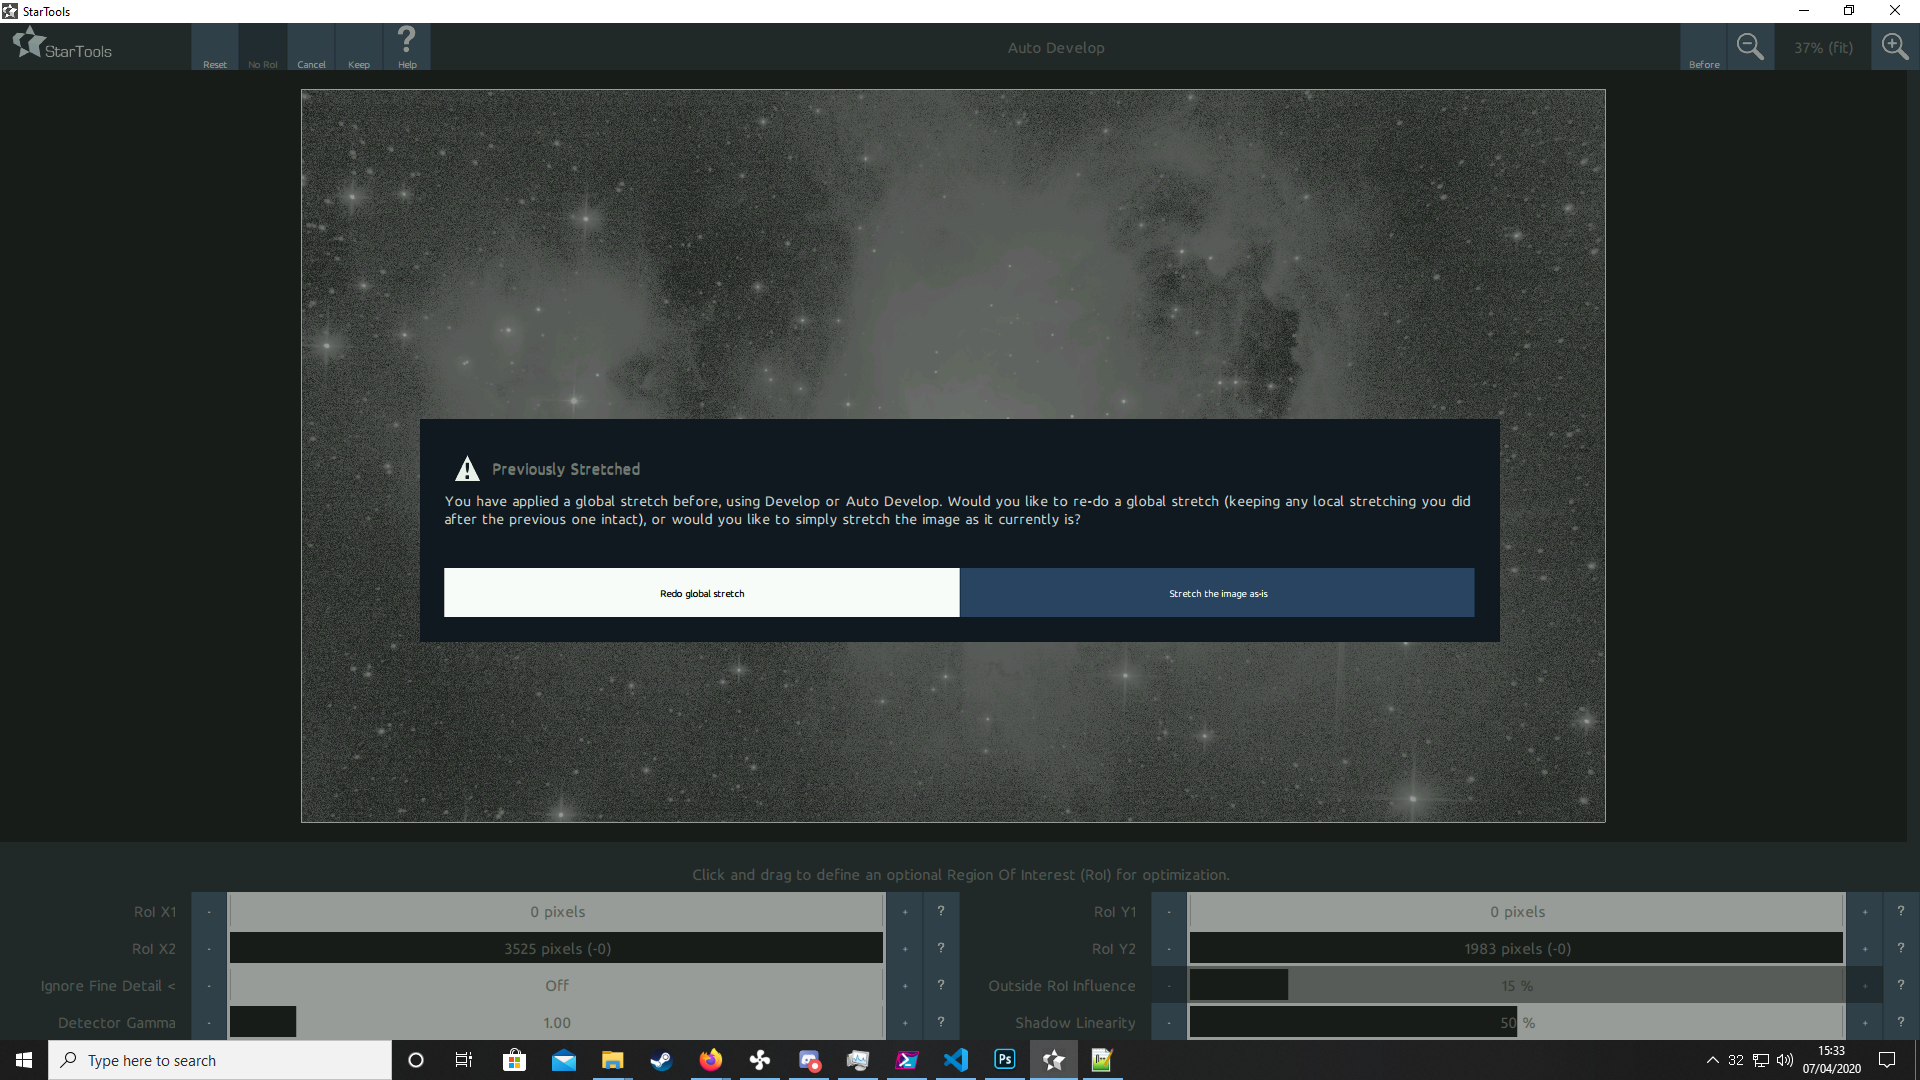
The most important factor influencing the AutoDev is the 'Region of Interest (ROI)' which is created by dragging a box over the area that is to be the main focus of the image. The 'Ignore Fine Detail' slider also helps isolate the signal from the majority of background noise that may also be picked up inside the ROI. Here it's a matter of tweaking mainly the ROI to get a good balance of signal, features and background. Creating too 'shallow' of a stretch here can lead to loss of faint detail and an overly contrast heavy image so some background noise is acceptable.

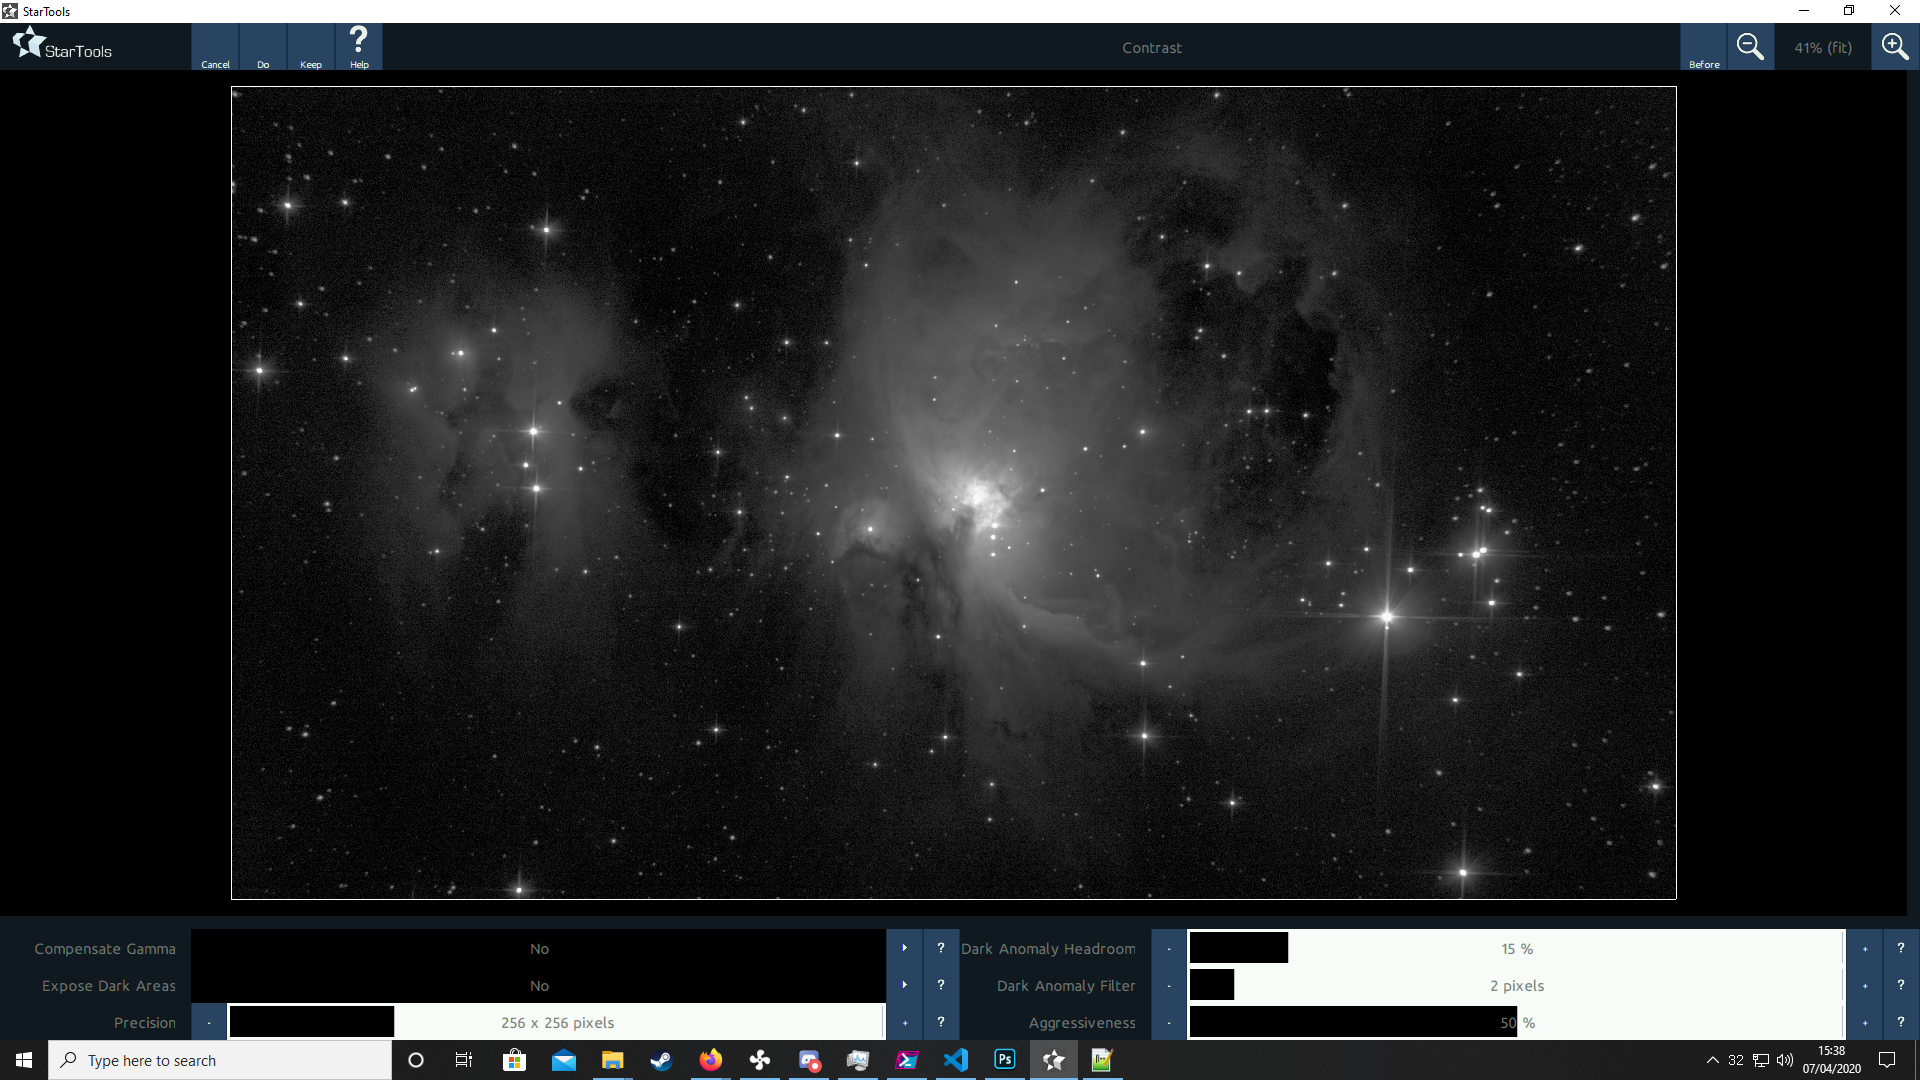
Contrast
A simple module and mostly one or two clicks, the aim here is to bring forward the signal and send back the background noise. The 'Precision' parameter can be adjusted at the expense of diminishing returns. This is analagous to creating an 'S-Curve' in other programs.
HDR
The HDR module aims to reveal or rebalance the brightest and darkest areas of the image, either revealing a galaxy's core details or suppressing much brighter areas of a nebula an raising the darker. In the Orion Nebula example the 'Optismise' preset is used to bring out the dark structures inside the nebula core areas.

A lot of this is down to personal taste or the overall goal of the image and many of the settings can be tweaked using the 'Before/After' toggle button in the top right of the program window to compare the changes HDR has made to the image.
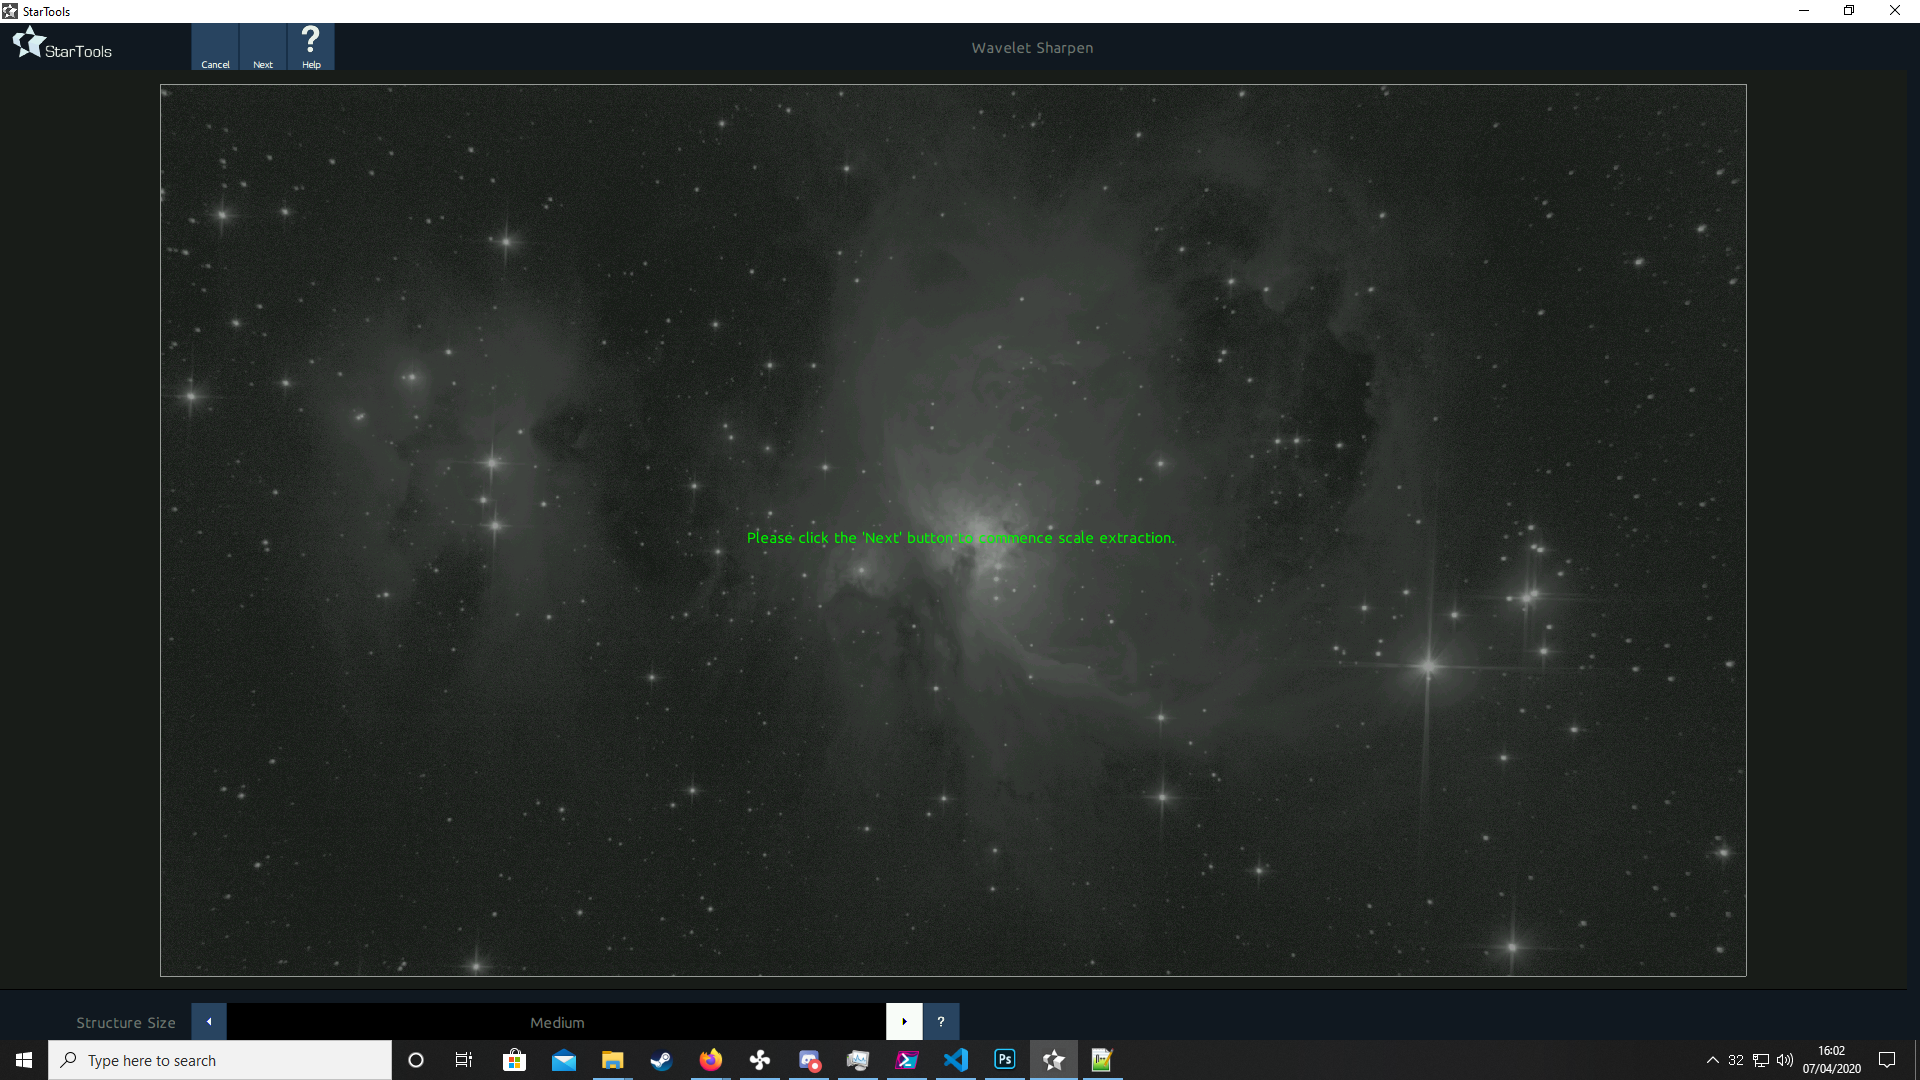
Sharpening
Sharpening aims to enhance the structural details of an image. The first option the module asks is what 'Structure Size' is going to be the target of the Sharp module. In the M42 example 'Medium' sized structures are the target to emphasise the fine details in the core of the nebula.
In the two comparison images below you can see the 'Amount' of sharpening was changed to 245% and this makes the definition of the dark cloudy structures in the nebula more defined and detailed.

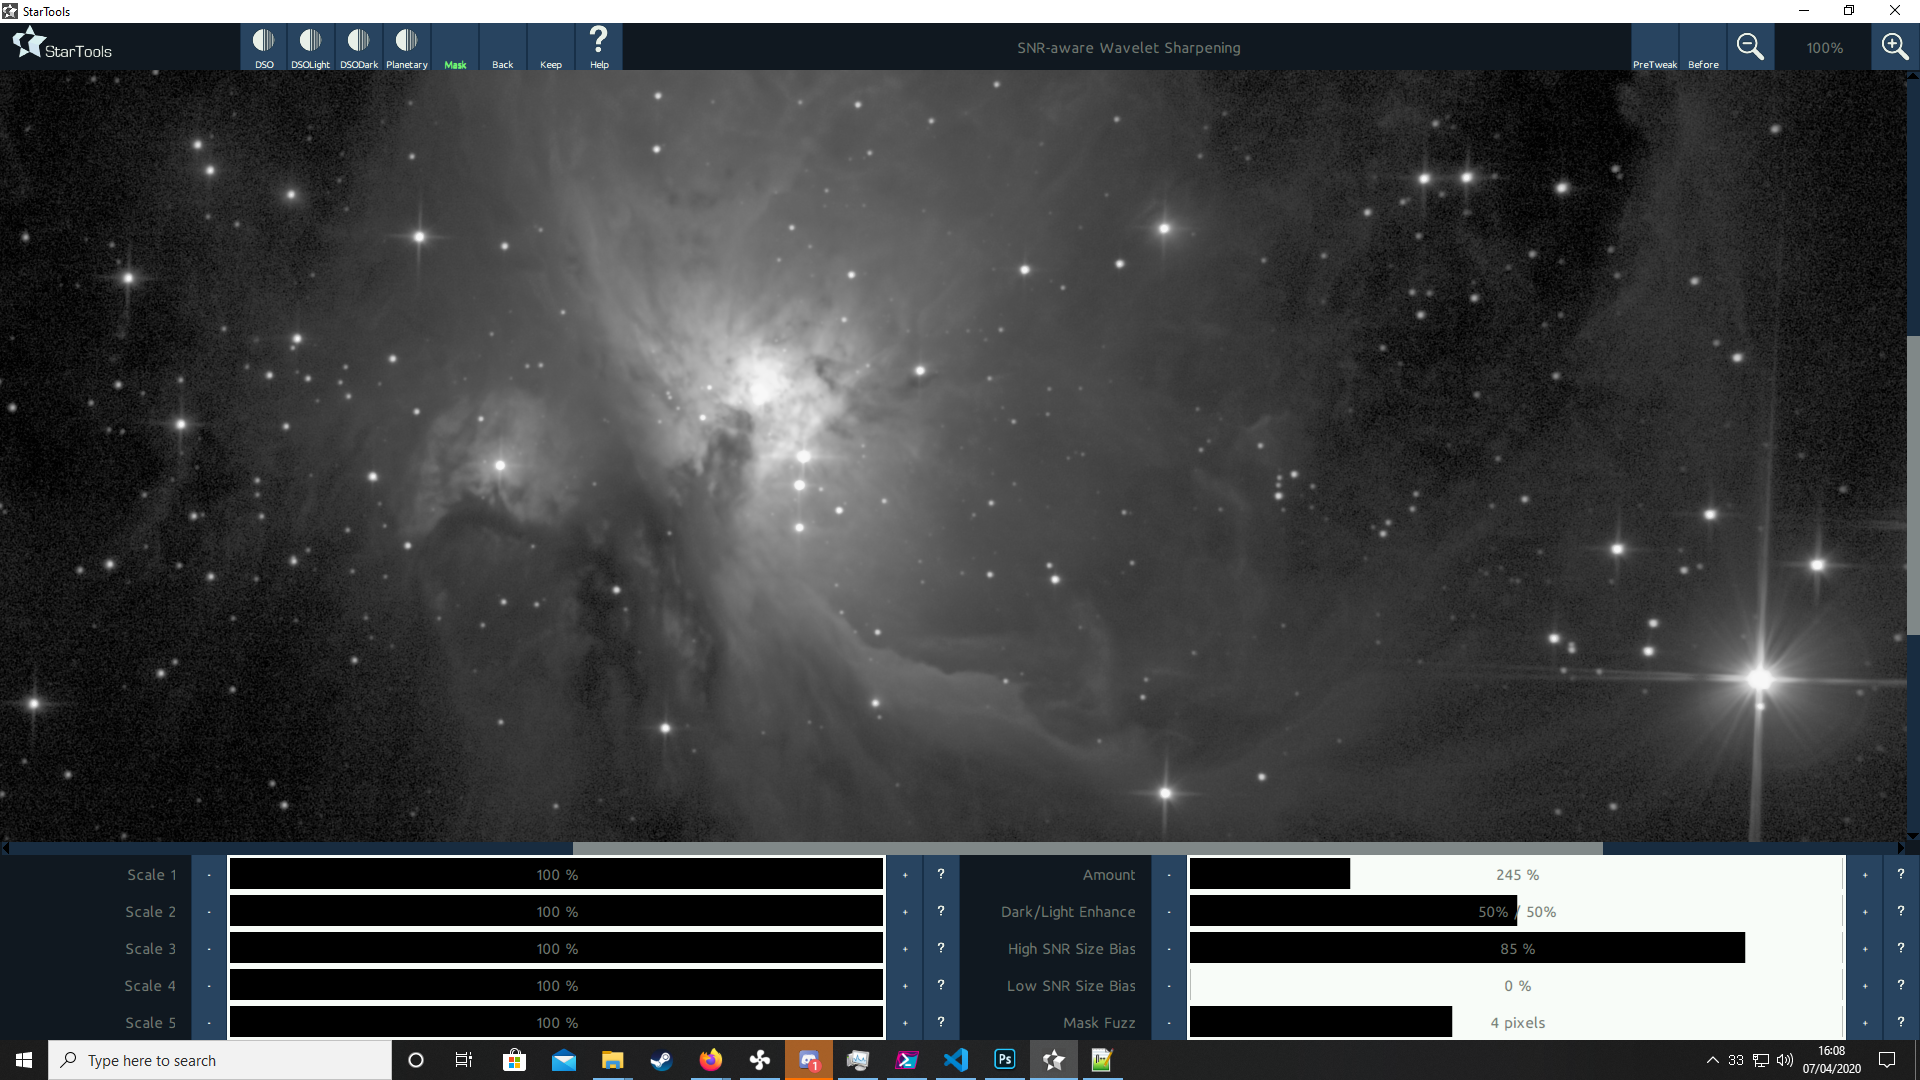
This is largely down to taste and overall image goals once again. Using the Sharp module on Large scale structures would have focused more on the outer layers of the larger cloud details and star shapes, wheras Small would pick up some of the smallest features and also a bit of noise as well. There's nothing stopping you from running Sharp at all the different scales or just one or two.
Deconvolution
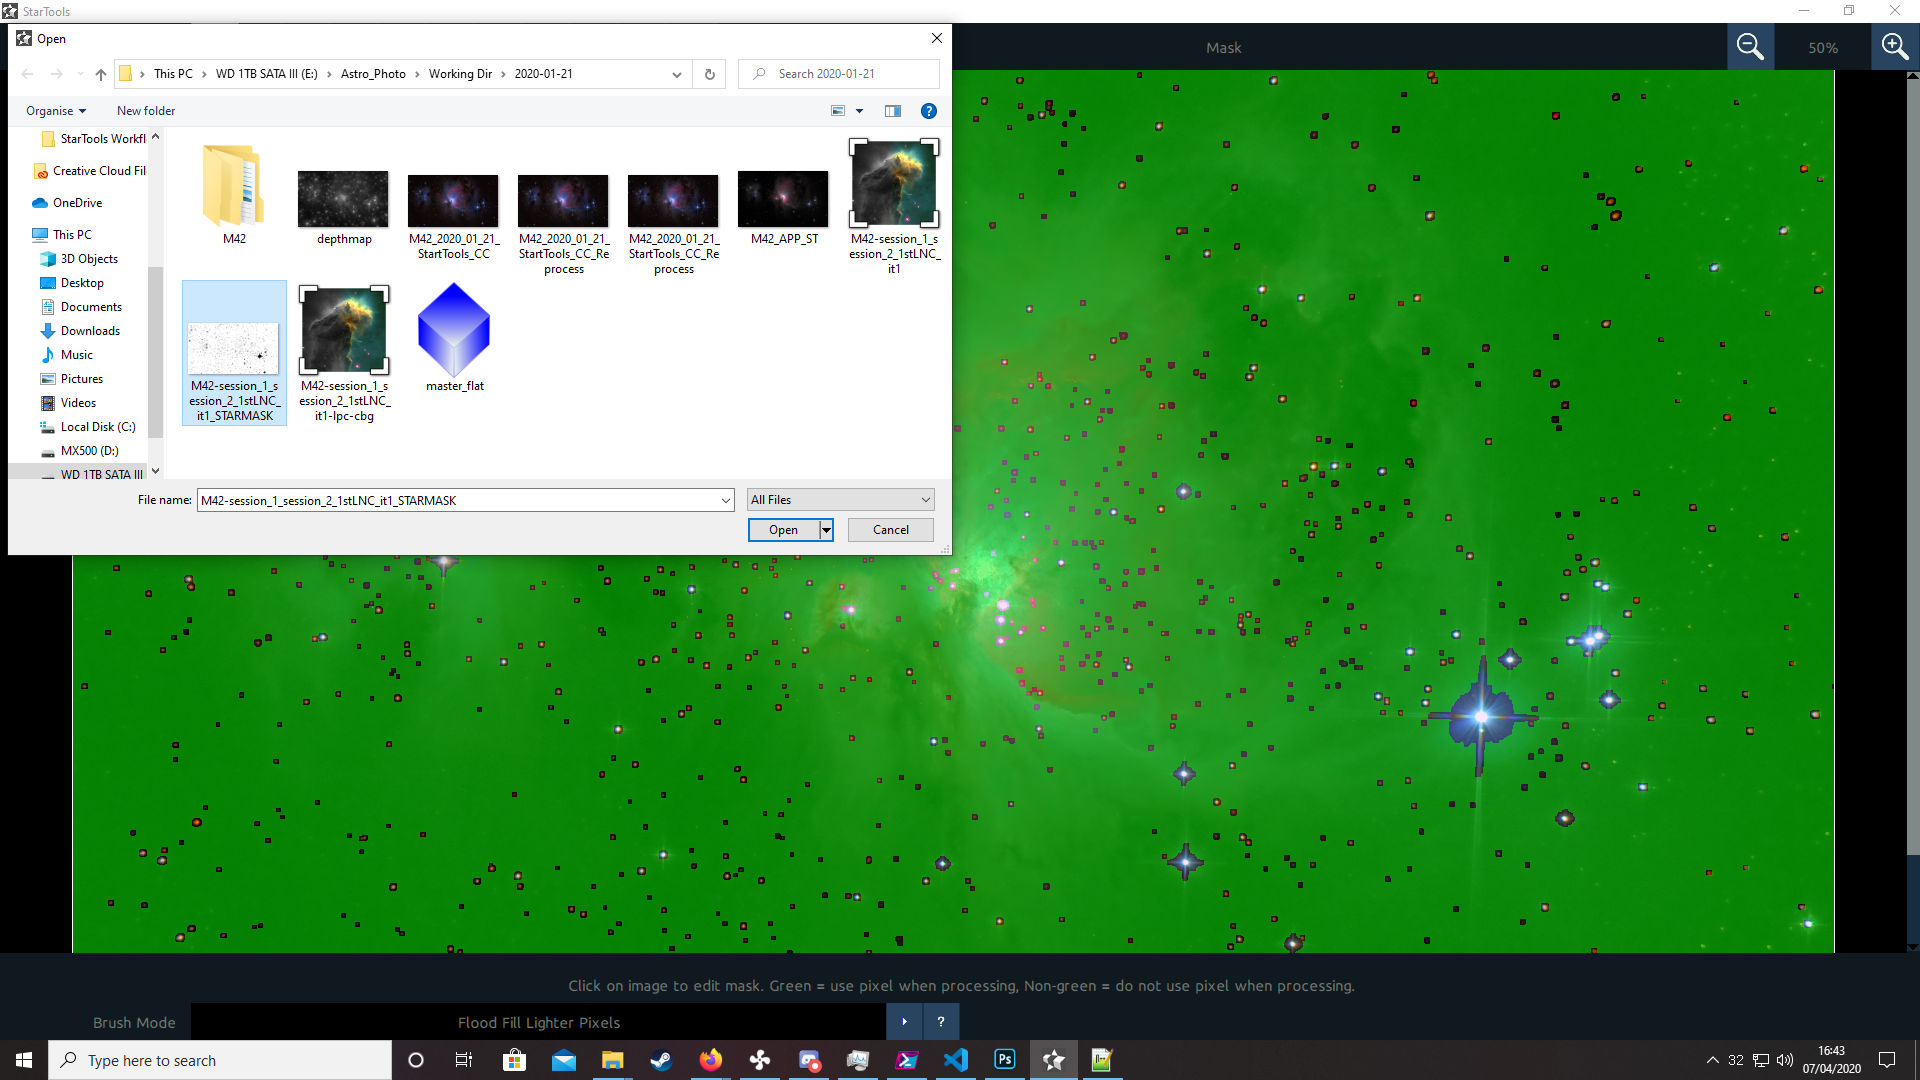
Creating a Star Mask
Deconvolution is traditionally a tricky task to get right, often either leaving an image covered in over-exagerated bubbles of noise and 'worms' or excessive ringining around stars. This can also happen in StarTools, but the control you have is often more intuitive.
First a good Star Mask is needed and fortunately StarTools has a good Auto selection of stars in and image. In the first image below the Decon module has prompted a creation of a Star Mask and the 'Auto Generate' option selected which has picked up a good range of stars and also a fair bit of background noise.
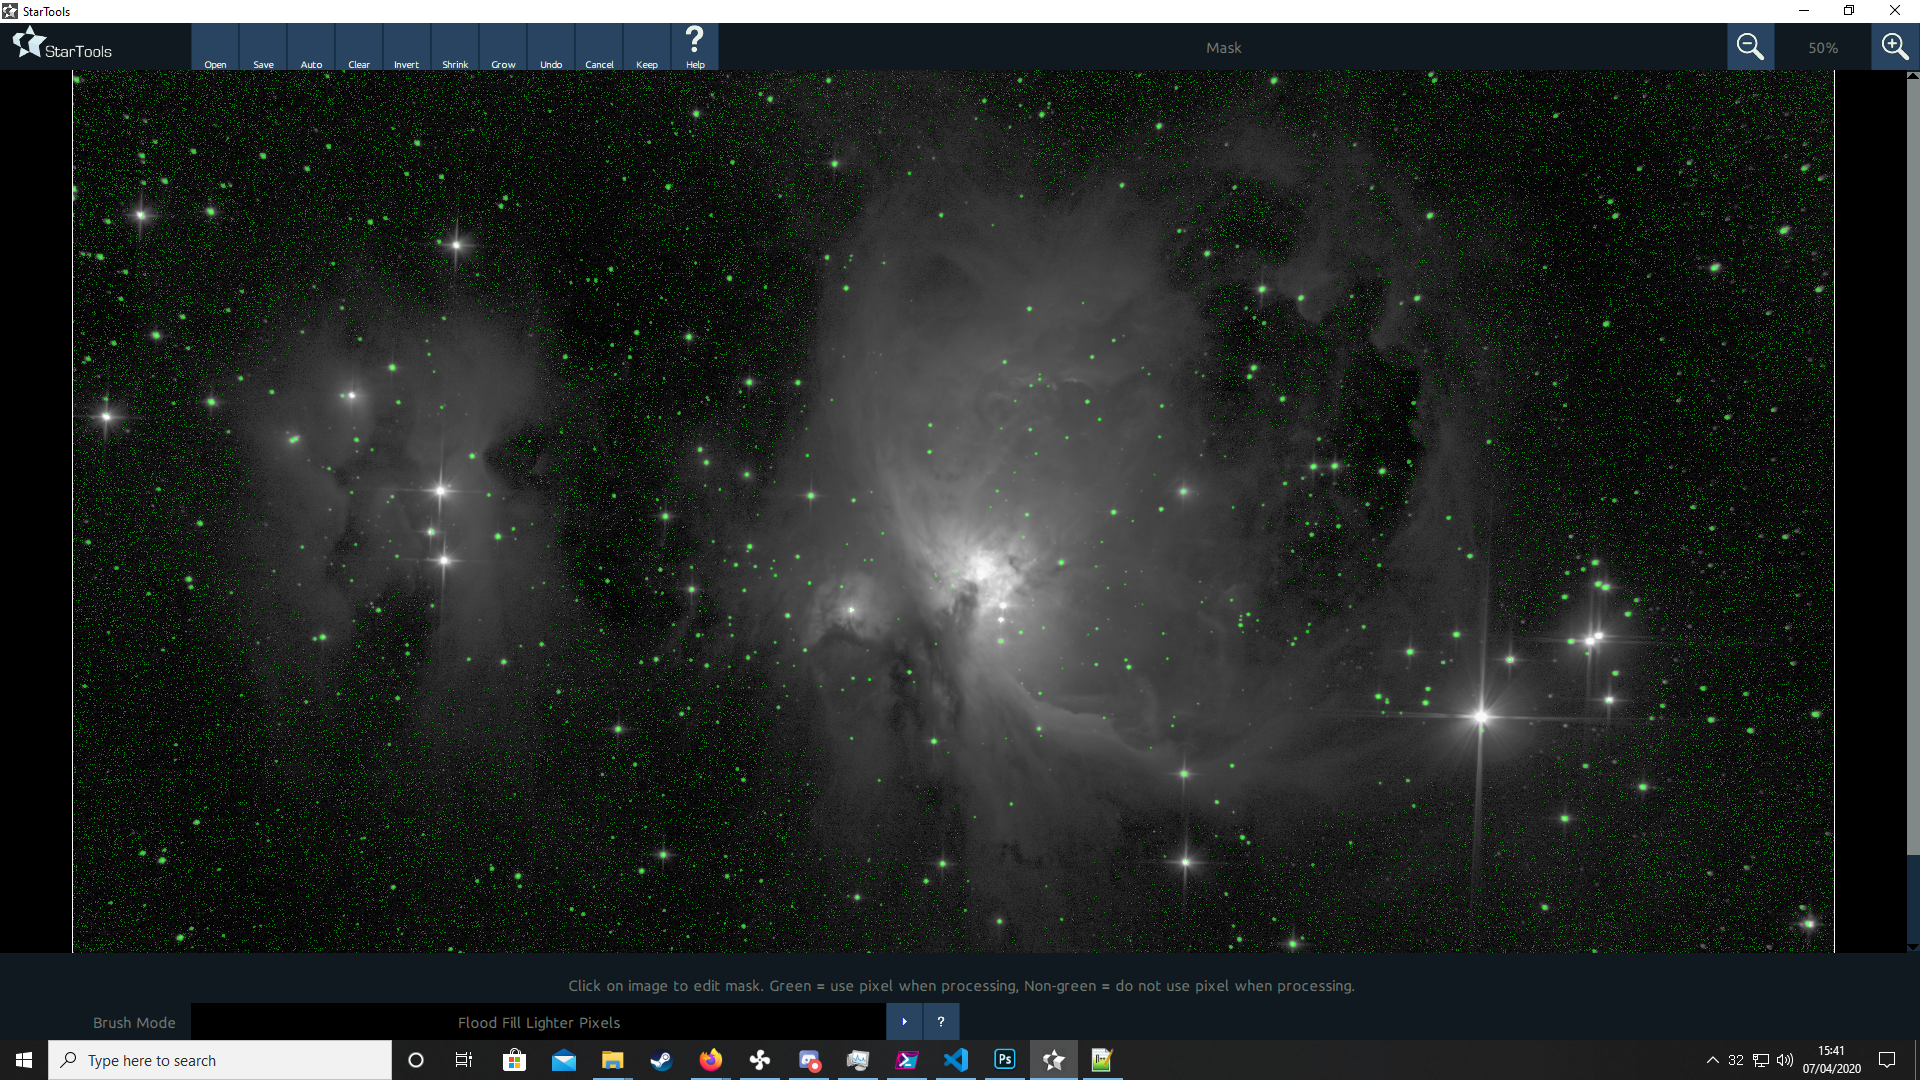
In order to remove all of the noise selected in error, it's a simple case of pressing 'Shrink' once to bring back the one pixel noise selections to zero, hopefully leaving just stars selected.
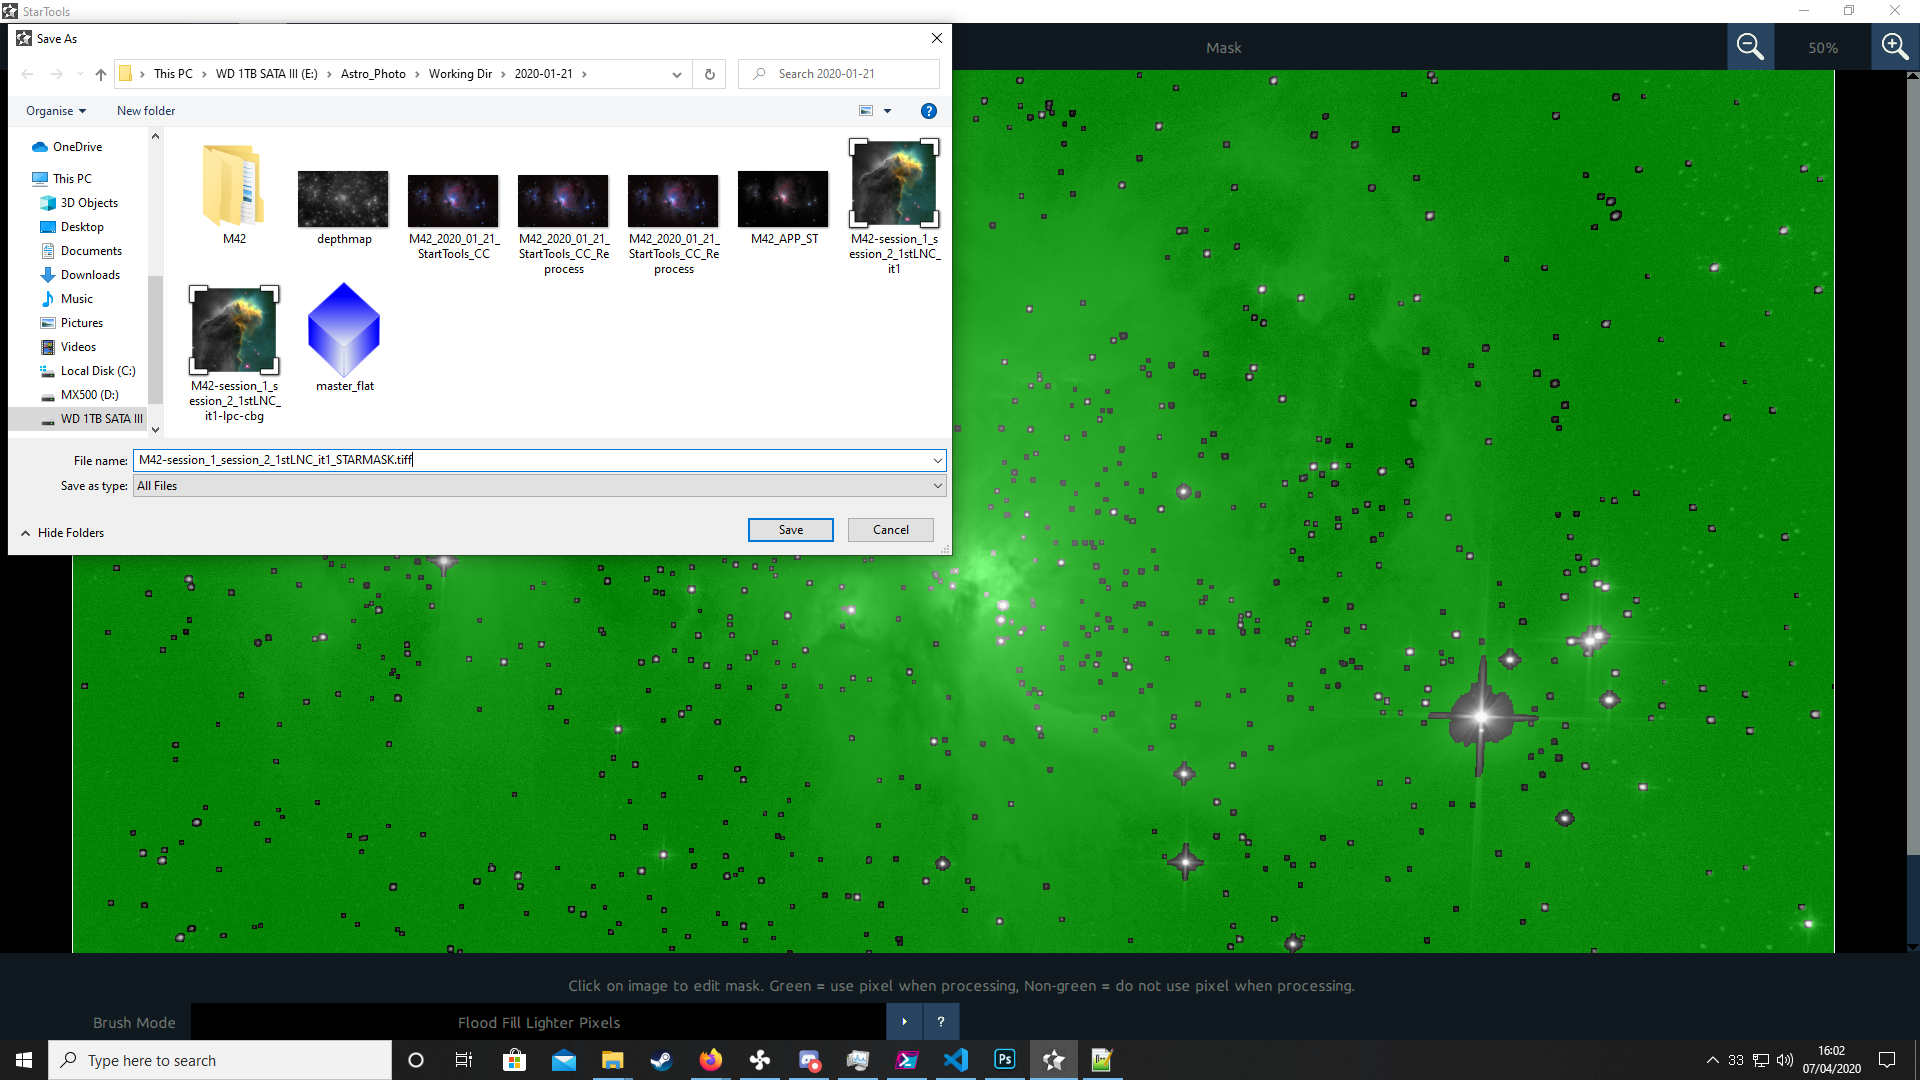
Next using a combination of 'Flood Fill Lighter Pixels', 'Lasso' and the other available tools in the bottom left of the screen the remaining stars that were missed by the mask can be manually selected. Don't worry about getting the entire radius of each star for now, just the core is fine.

The more thorough the selection of stars at this stage, the more accurate and less ringinng will appear in the final image so patience is key here of all the image processing stages.
Once all the stars are selected, use the 'Grow' button two or three (or more) times to fill out the selections of the stars to get a good mask that covers the whole of each star.
For images with a Newtonian or similar reflector with diffraction spike you may need to lasso the large spikes to preven them getting affected by Decon as well.
Once a good mask is over all the stars, simply press 'Invert' to select everything but the stars; this is where we want to apply deconvolution, not the stars themselves.

A good tip from experience is to save this finished mask so that it can be reused later on in processing. Just make sure you don't resize the image or the saved mask will no longer be valid, leave all final cropping and resizing until the end of processing.
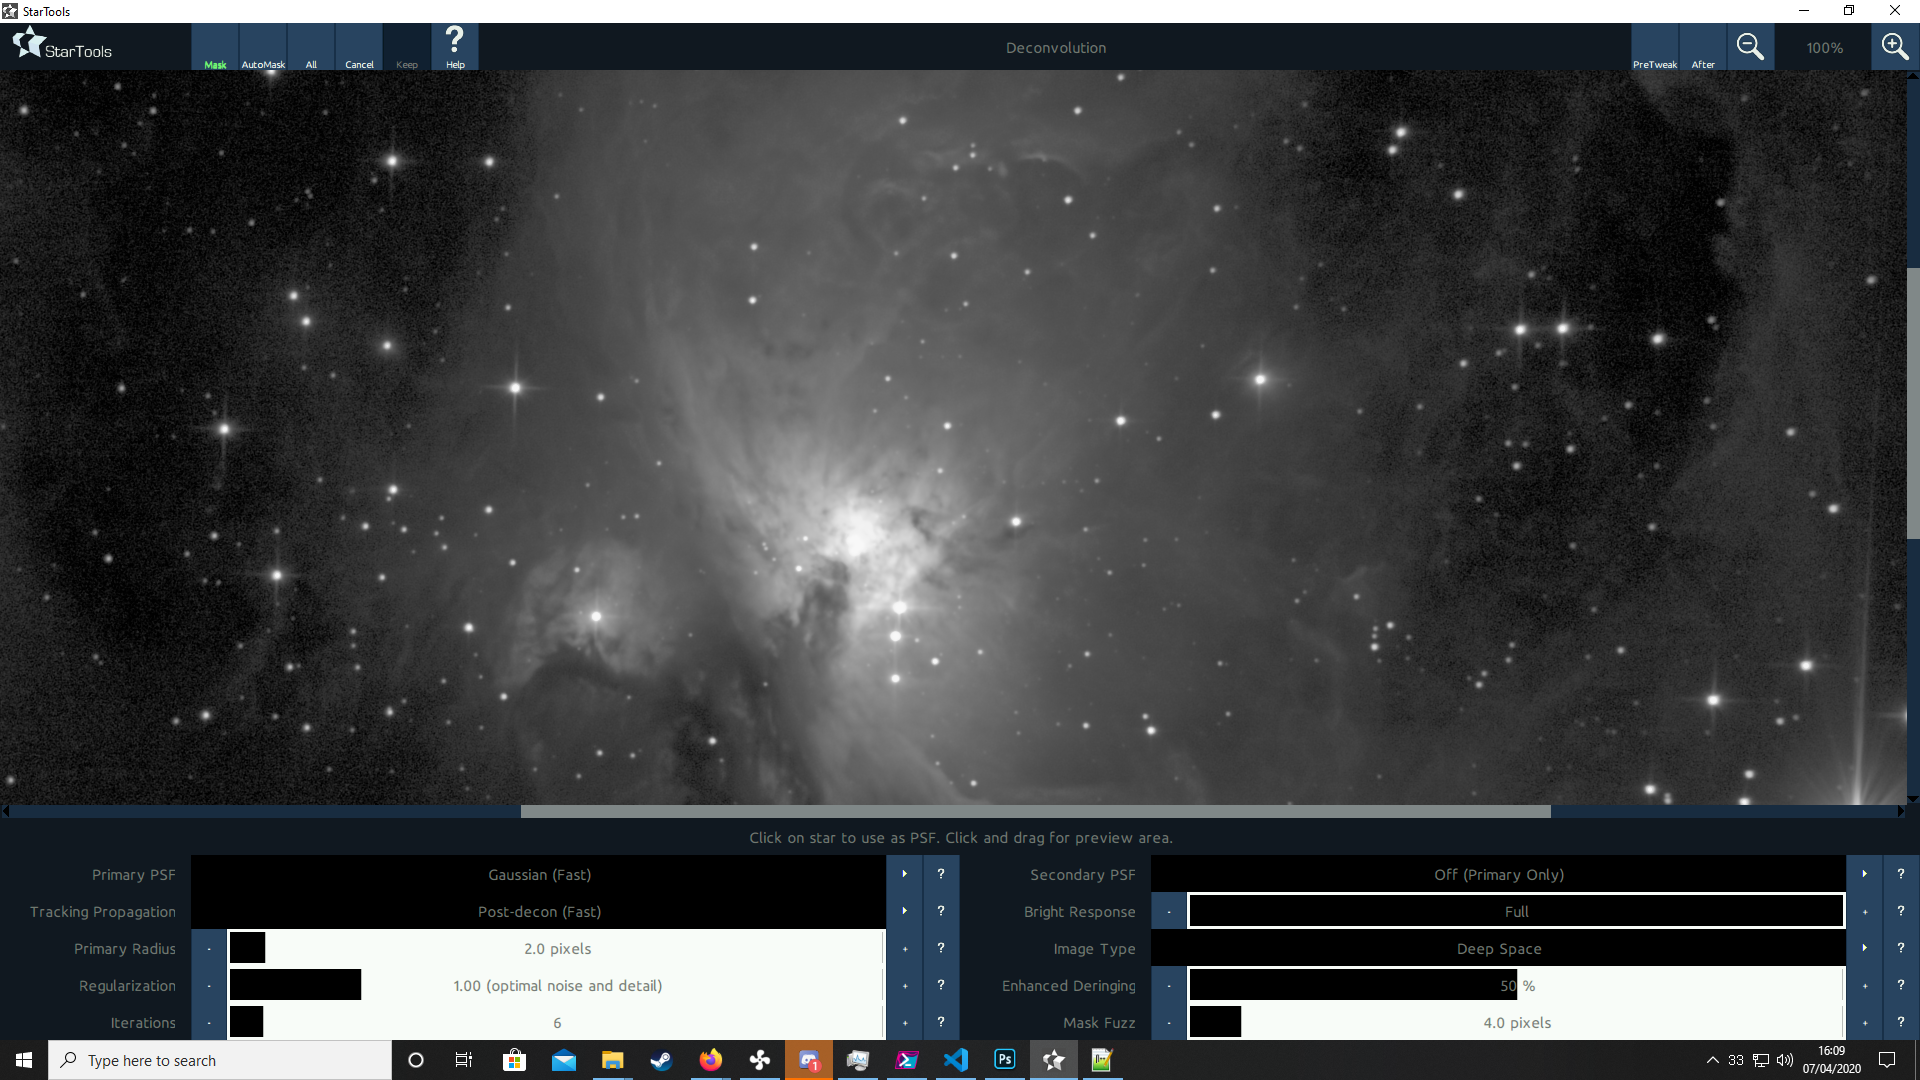
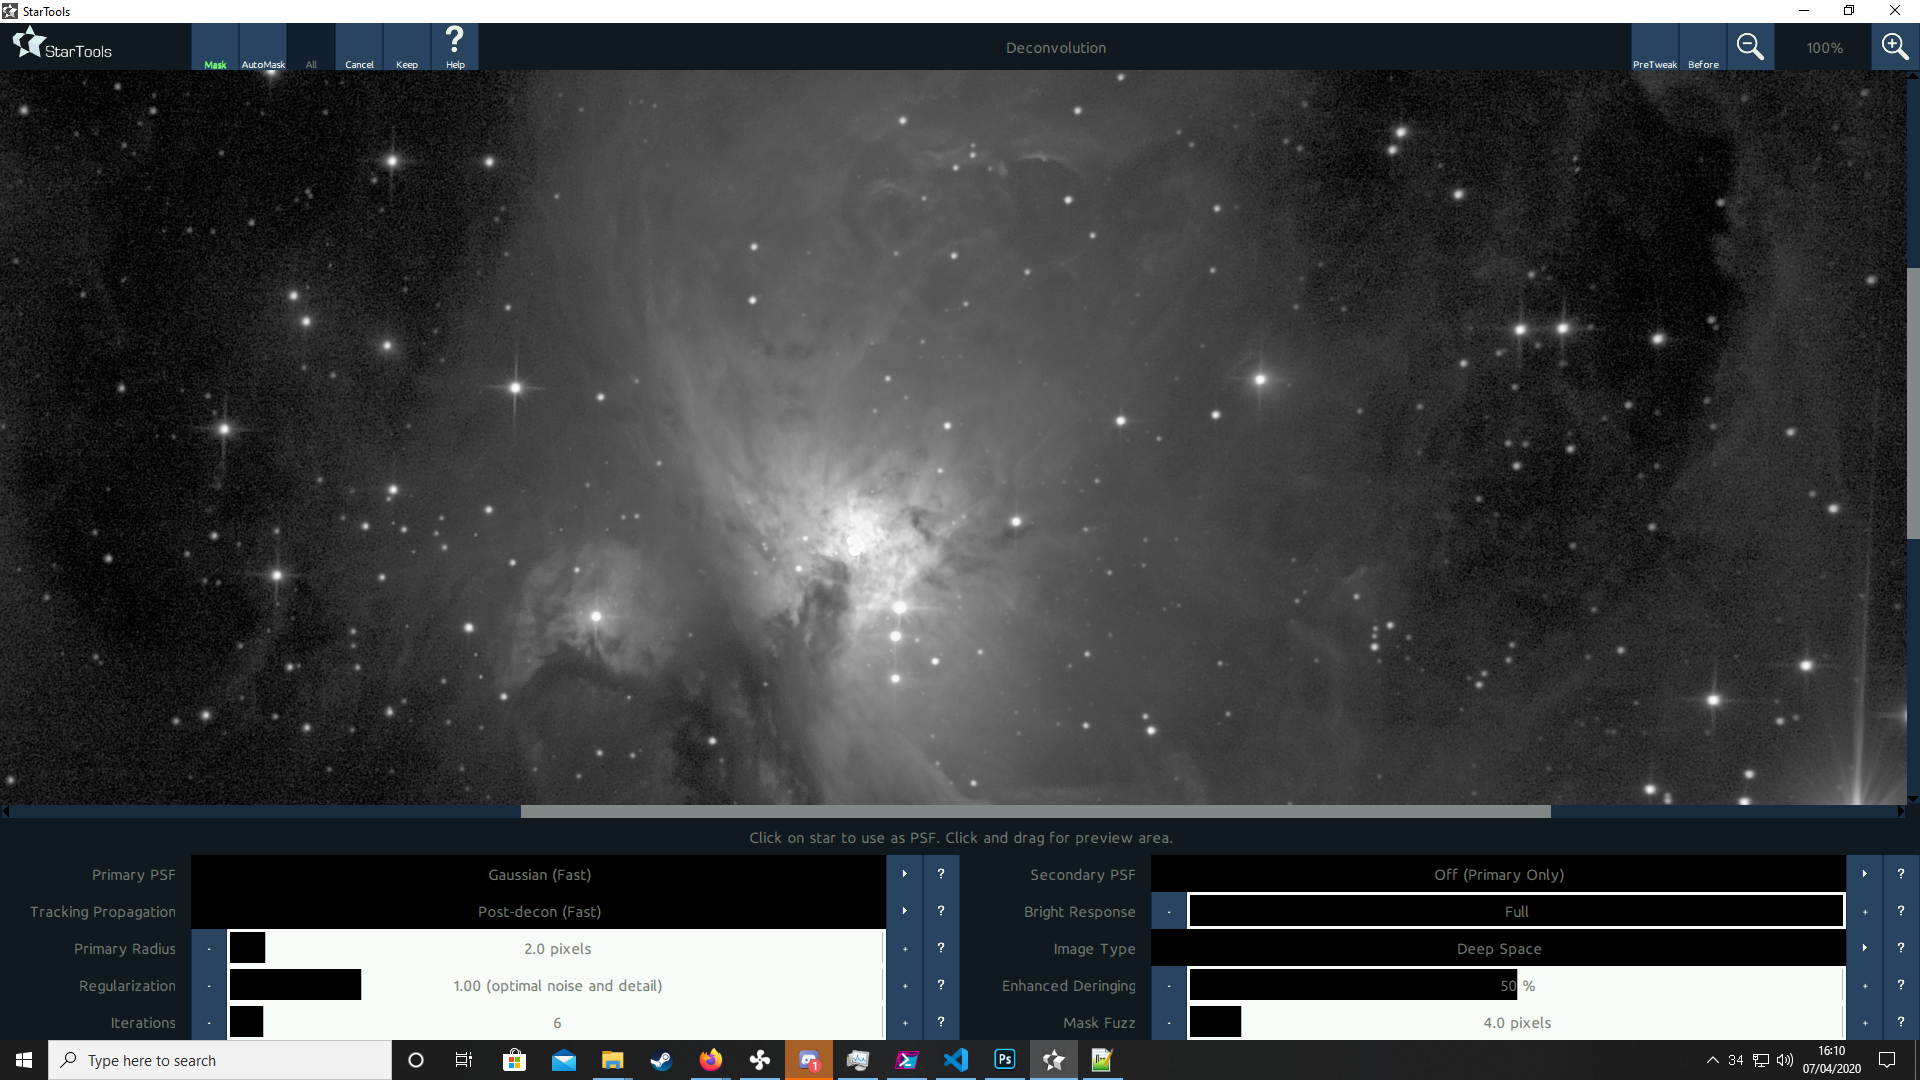
Deconvolution
The main aim of deconvolution is to correct for atmospheric disruption to the structures in the image, essentially refocusing the air that was in between the telescope and the universe to minimise the effects of known atmospheric turbulence patterns on the raw detail underneath.
Unfortunately this is different for every image and is essentially a matter of trial and error. In the example image the options are left largely at default, with adjustments to the 'Primary Radius' being the most important with the largest effect on the image.
Two important features of the tool are the ability to click a typical star in the image to model PSF to aid the deconvultion routine and the click and drag to create a preview area which allows you to experiment with settings and see their effects in near real time by only rendering a small area of the image.
In the three images below you can see a comparison between before, after a moderate decon at 2.0 pixels and an aggressive 3.6 pixels for comparison.

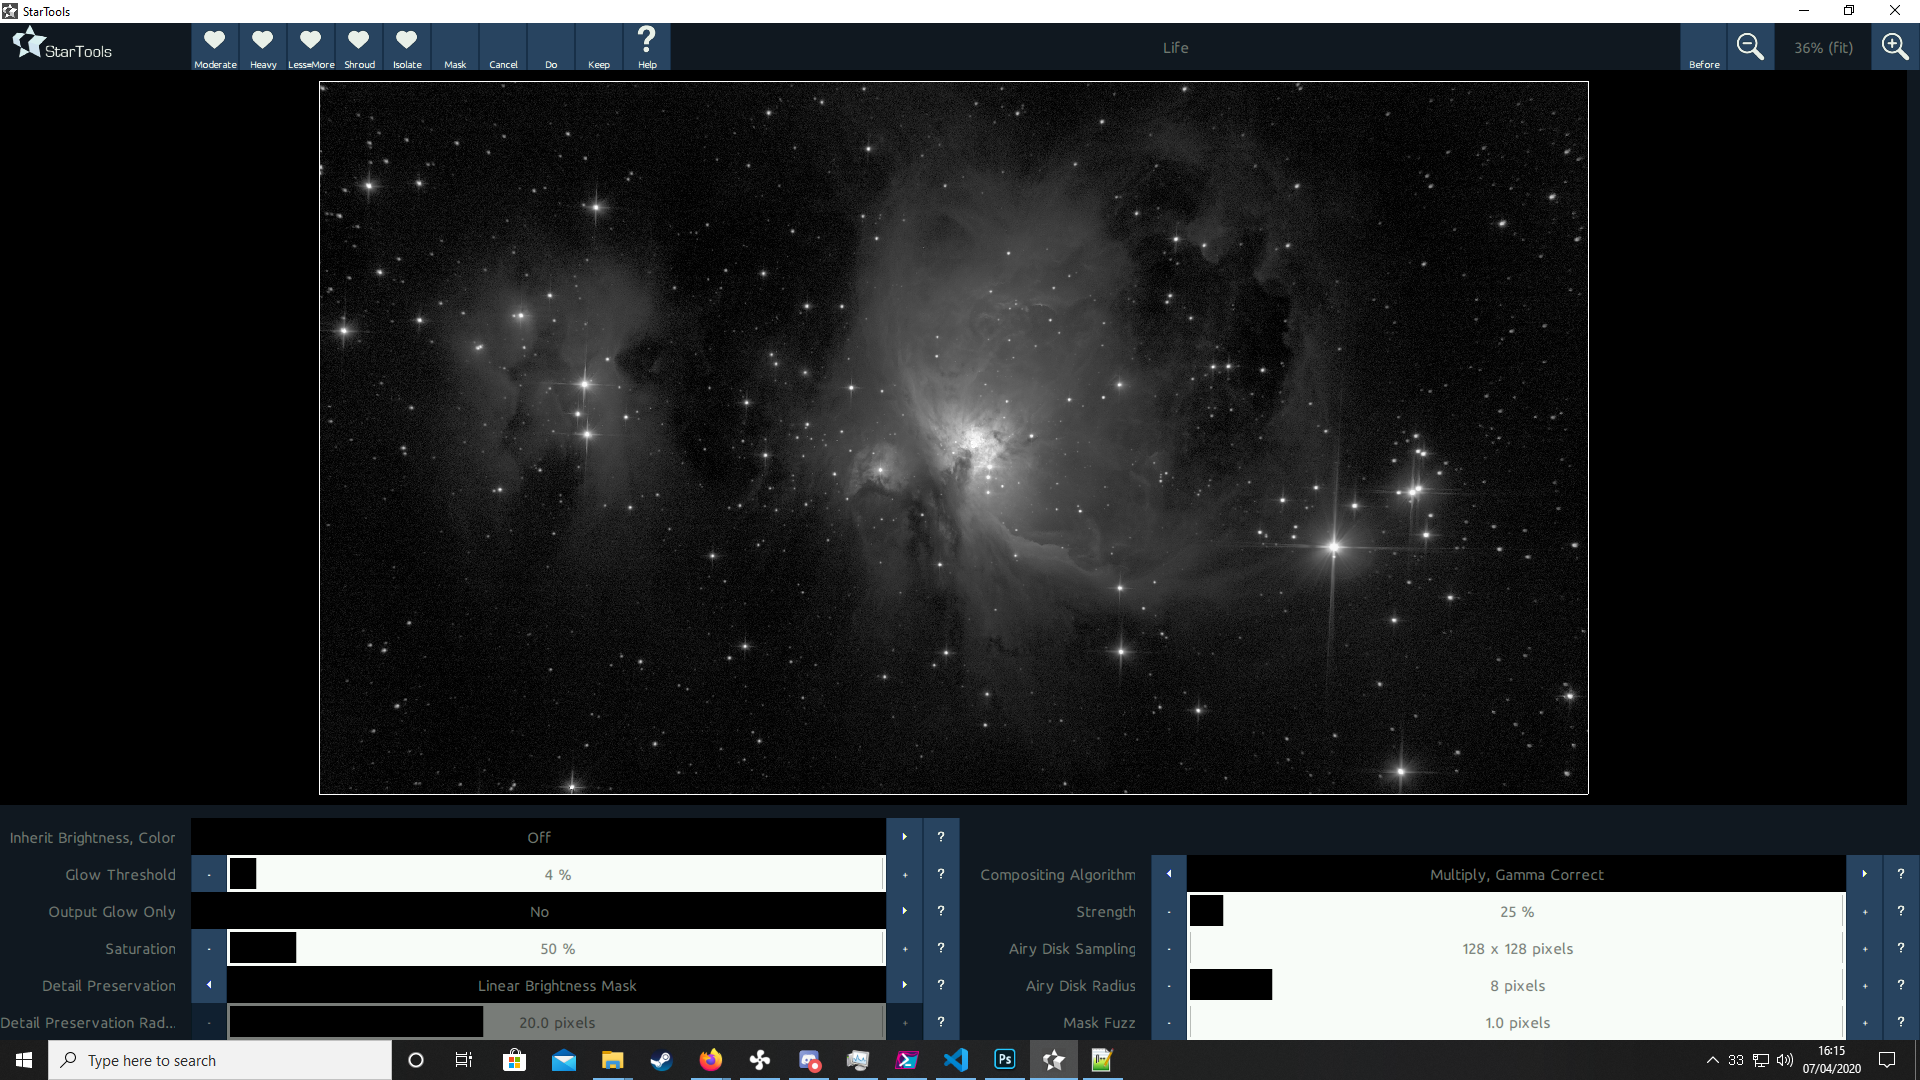
Life
The Life module is usually entirely optional and aims to work on the overall balance of the image by modelling light over the image as a whole, whether that is balancing eveything to be more uniform, isolating features, or bringing the background down and overall image into a better balance.
This is the definition of user preference but in the example of M42 'Less=More' was run in the Life module to subtly push the background back a bit a bring the attention to the nebula itself. An explanation of all the settings can be found through the help button.
Colour
The fun part, introducing colour into the black and white image you've been looking at so far. With a DSLR like the Canon 400D being used in this example the colour module is initiated and 'Matrix' is selected for the 'Canon EOS 400D' to match the camera.
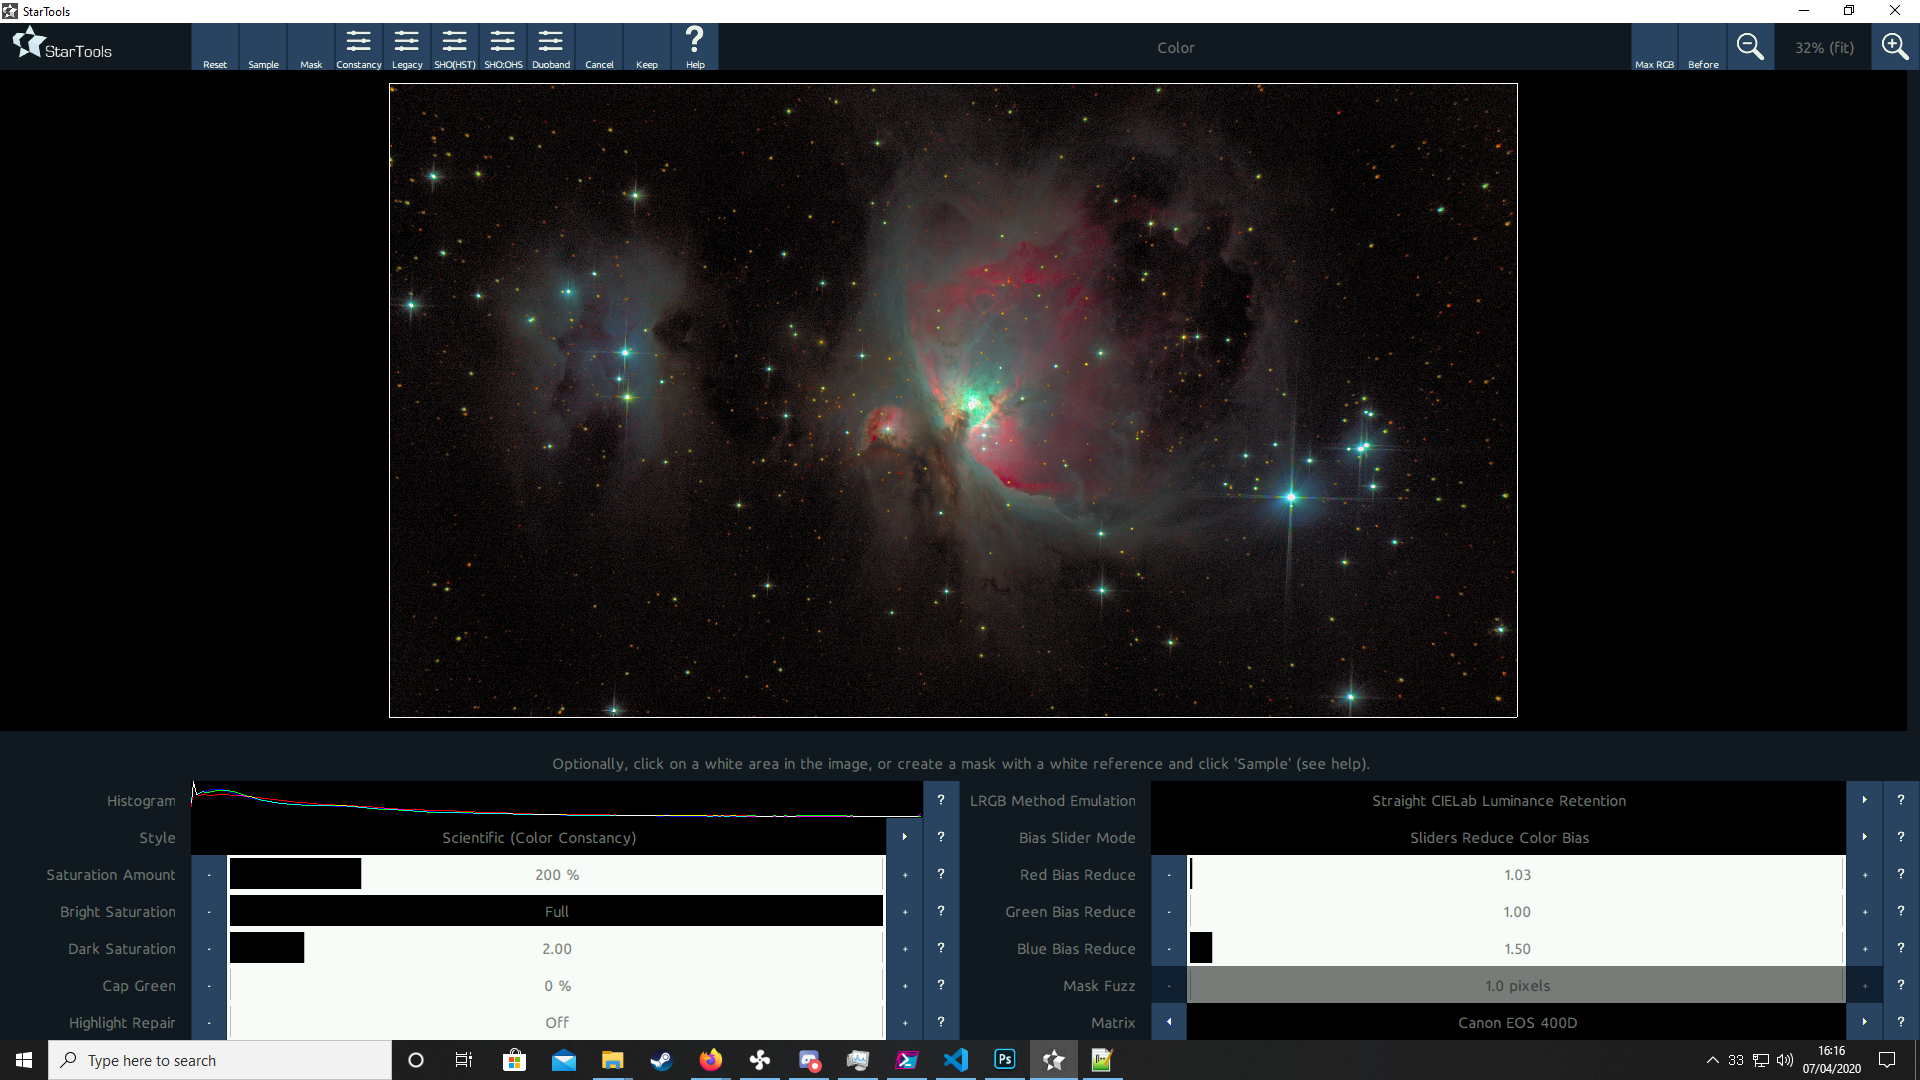
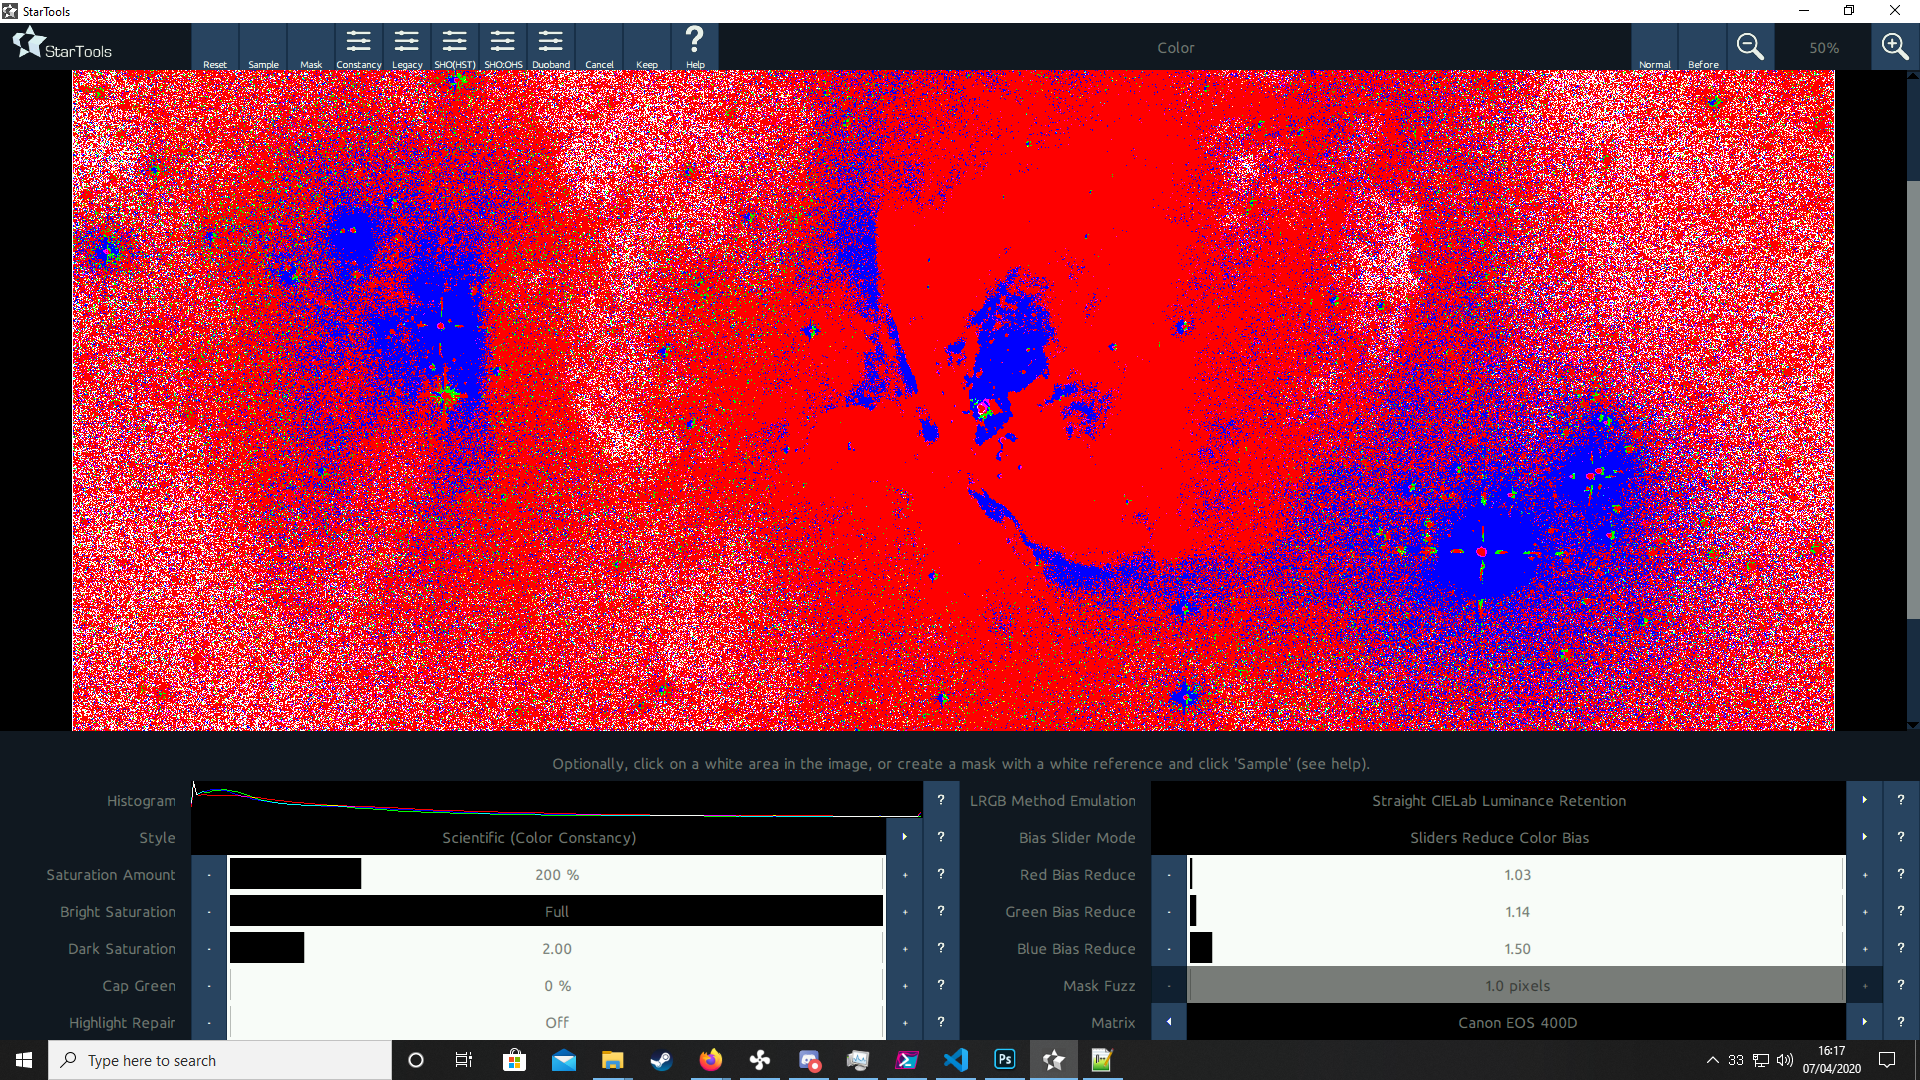
By default the 'Saturation Amount' will be at 200% which makes it easy to see the effect the colour tweaks you make are having on the image. To make things easier you can also use the 'Max RGB' toggle in the top right to see the dominant colour over each pixel of the image, useful in createing a natural known colour balance. Stars are the key here, you want very little green on any star, with red across most stars as they are more common than blue stars in the universe.
Subtle tweaks to the 'Red/Green/Blue Bias Reduce' sliders here make big differences ands its best to toggle between Max RGB and normal view often and adjust values by single presees of plus and minus at a time.
Of course colour balance is largely a matter of taste or final objective in the image. Whether you are trying to get natural colours as the human eye would perceive them, or something completely different it's all entirely valid.
One final change before moving on though is the adjusting of the 'Saturation Amount' slider to a value that isn't so overblown as the default 200%. In the example 132% was chosen to have some bright pink-red areas whilst maintaing an interesting colouration of surrounding brown dust and the red glow of the Running Man nebula which fade away at lower saturations.
'Dark Saturation' can also be adjusted but this strongly influences background colour so it's different per image.

If the image comes from a DSLR a residual amount of Green will likely remain in the image, which can be removed with 'Cap Green' but ultimately I prefer to remove this later on without this option as it can have unwanted effects on overall colour balance as you're essentially cutting off green signal.
Entropy
A complex module that seeks to restore or bring out detail using colour information. Whether this is useful is different per image, but it is mostly used in Narrowband imaging.
It is still worth experimenting with it like the Life module, but I've found it can make already noisy DSLR data even more so with little beneficial effects.
Here it is used at 41% to make subtle changes to the image detail at the smallest scales, possible with such a clean Signal to Noise ratio on the bright Orion Nebula.

Denoise
Denoise is a funny procedure in StarTools, it has essentially been recording all the changes to the image in the background until this point using the 'Tracking Engine' which helps the tool retain information in areas of the image you want to keep, while working out what is likely background and a good candidate for noise reduction.
Noise reduction begins in StarTools through pressing the green 'Track' button along the top of the screen which prompts you for either 'Grain Removal' or 'Grain Equalisation' noise removal methods.
Detailed explanations can be found in the online documentation but 'Grain Removal' aims to reduce noise to smoothness, whereas 'Grain Equalisation' aims to reduce noise to a 'filmic quality' where it is perceivably less noisy yet not smoothed out all over the background.
![]()
In this image 'Grain Removal' or 'Denoise' (not Denoise2) is used as the image comes from a DSLR and is inherently noisy in the background. Clean signals can use equalisation to a better effect in a lot of cases and I prefer the look of Grain Equalisation overall, but for this image 'Removal' was chosen.
First of all the 'Grain Size' is chosen by reducing the background noise with a blur filter such that most of the perceivable noise is smoother in appearance and large clumps are no longer prominent.

Through the use of a preview area on an are of noisy background and little signal in the image the parameters are tweaked and adjusted in the next step of Grain Removal. Two presets are available 'Strategy1' which targets small scale noise and 'Strategy2' which targets larger scale noise as well. Here 'Strategy2' is used as there is heavy mottling in the background noise and a smoother result is desired overall.
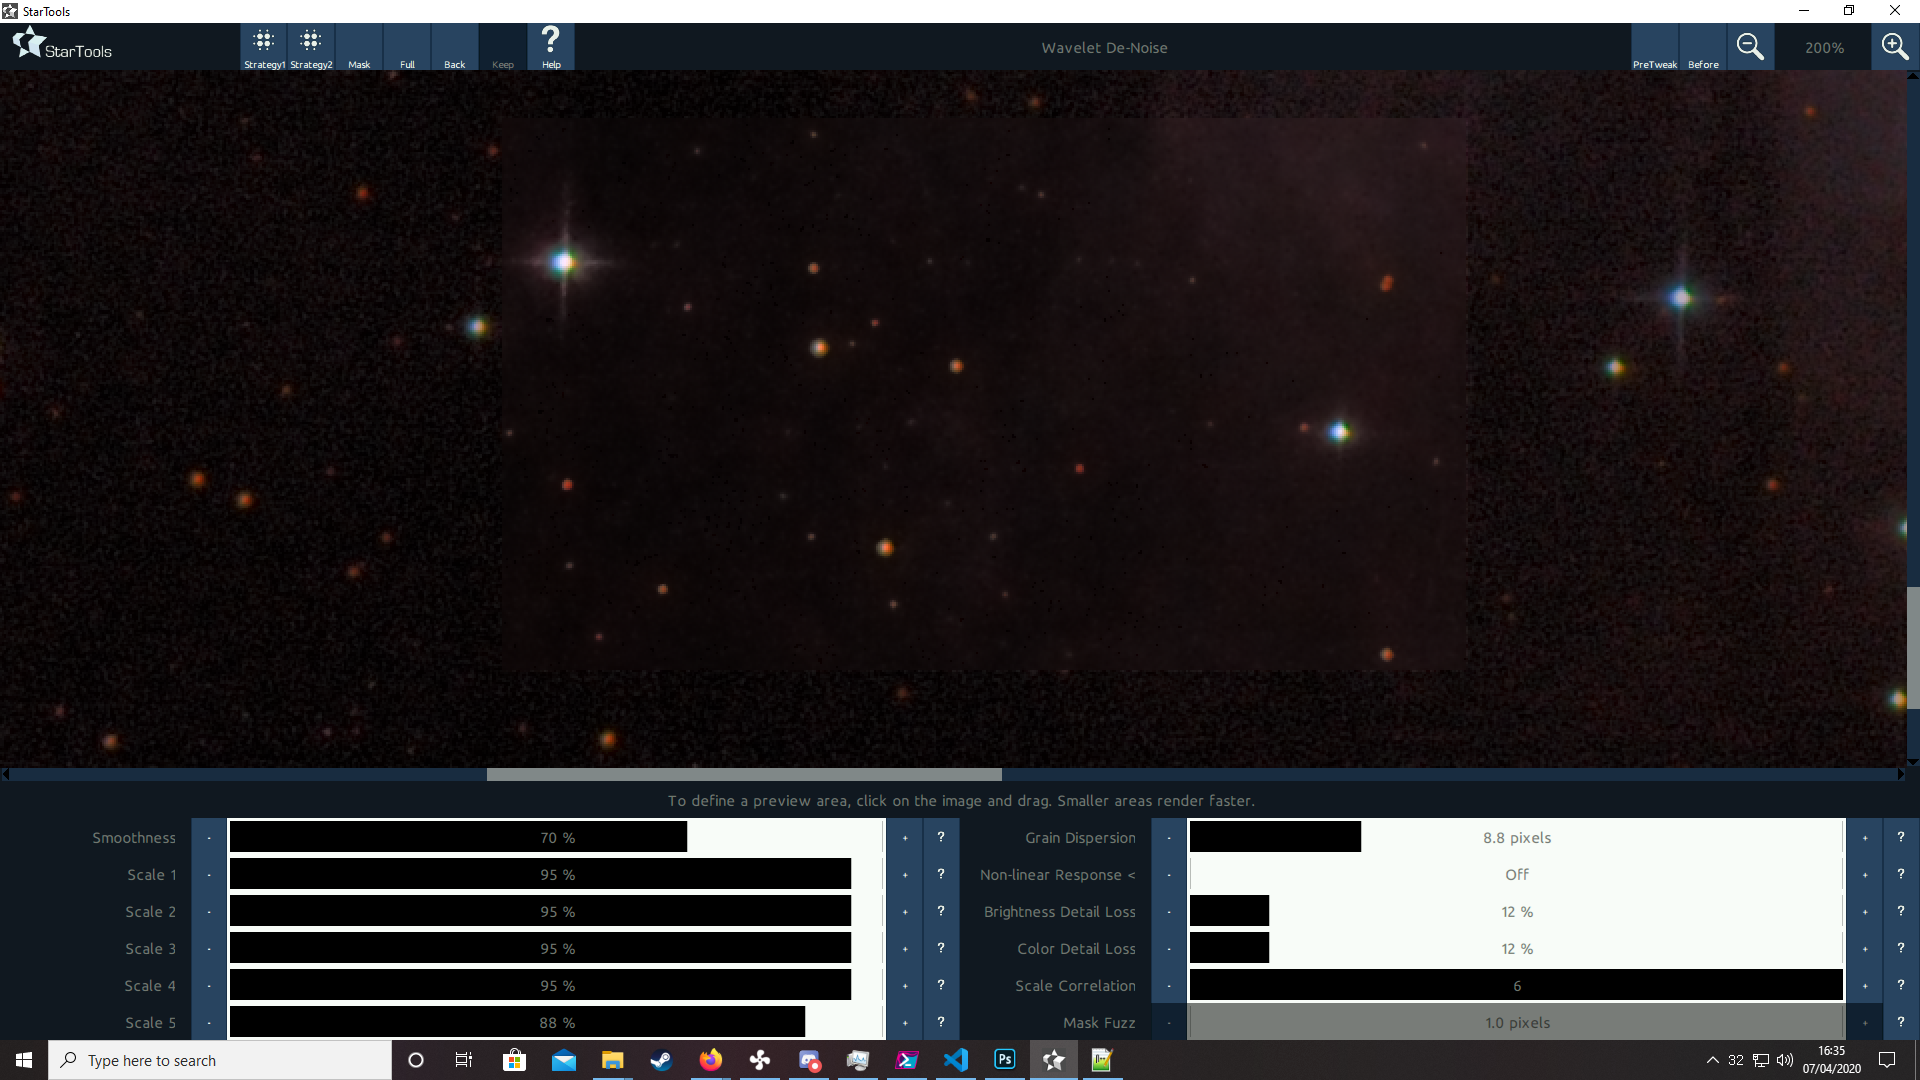
When a good set of compromises between detail and noise reduction is reached, the 'Full' button can be pressed to apply it to the whole image. This can take a few minutes depending on the power of the computer so a perfect time to grab a drink.

Once the desired result is achieve the module can be finished and the results finalised.

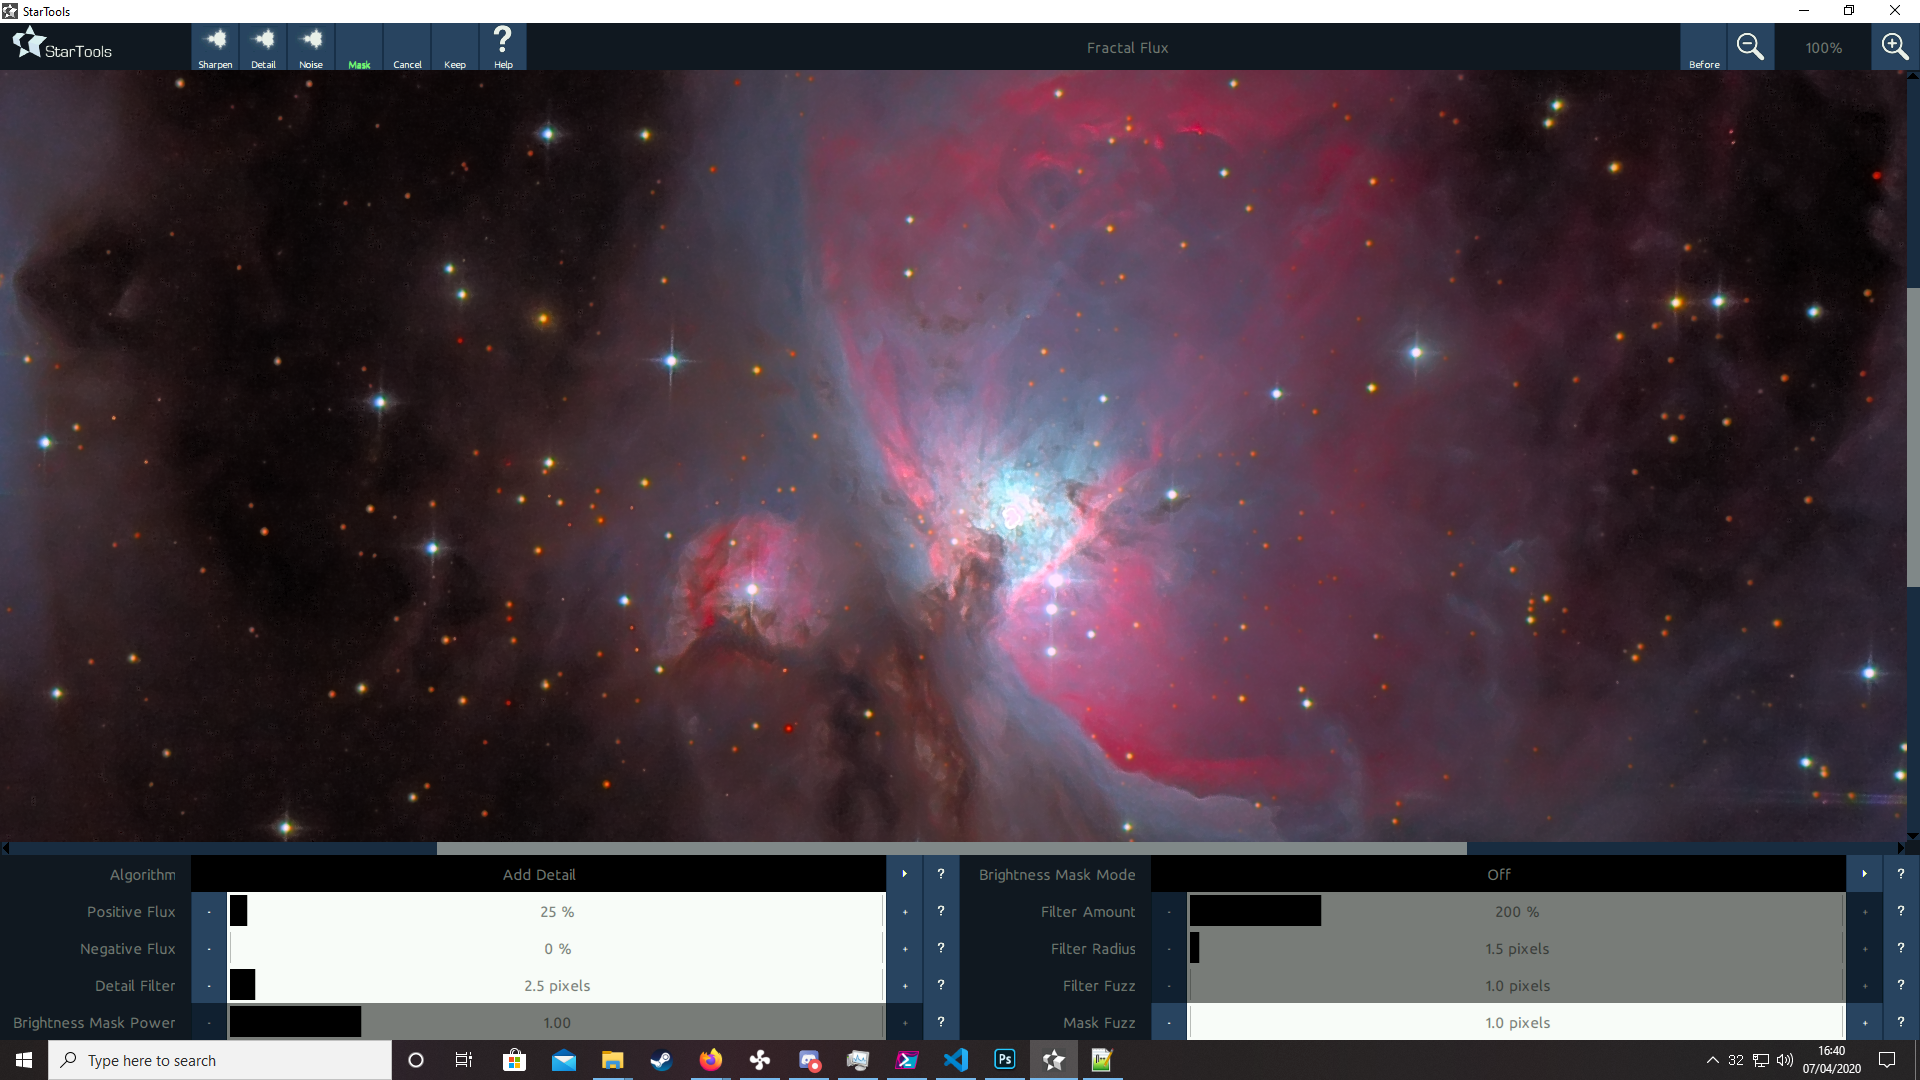
Flux
Flux is a module which works on latent details in the colour and luminence of a near finished image to either apply sharpening, introduce artificial detail extrapolated from colour data already present, or introduce noise back into the image in a more controlled manner.
Of course this is something that we don't want to apply to stars as they should be featureless and round so the mask saved from th earlier Deconvolution can be loaded in at first, or another Auto Star Mask generated.
This is a module that's either useful or it isn't and is mostly up to user preference and the original data quality. In the M42 example a small amount of sharpening was introduced to bring back some detail and definition after it was lost in the Denoise procedure.
Of the images below the first is the 'Sharpen' preset which was ultimately used in the final image, and the second is the 'Detail' preset which introduces 'best guesss' detail into the image.

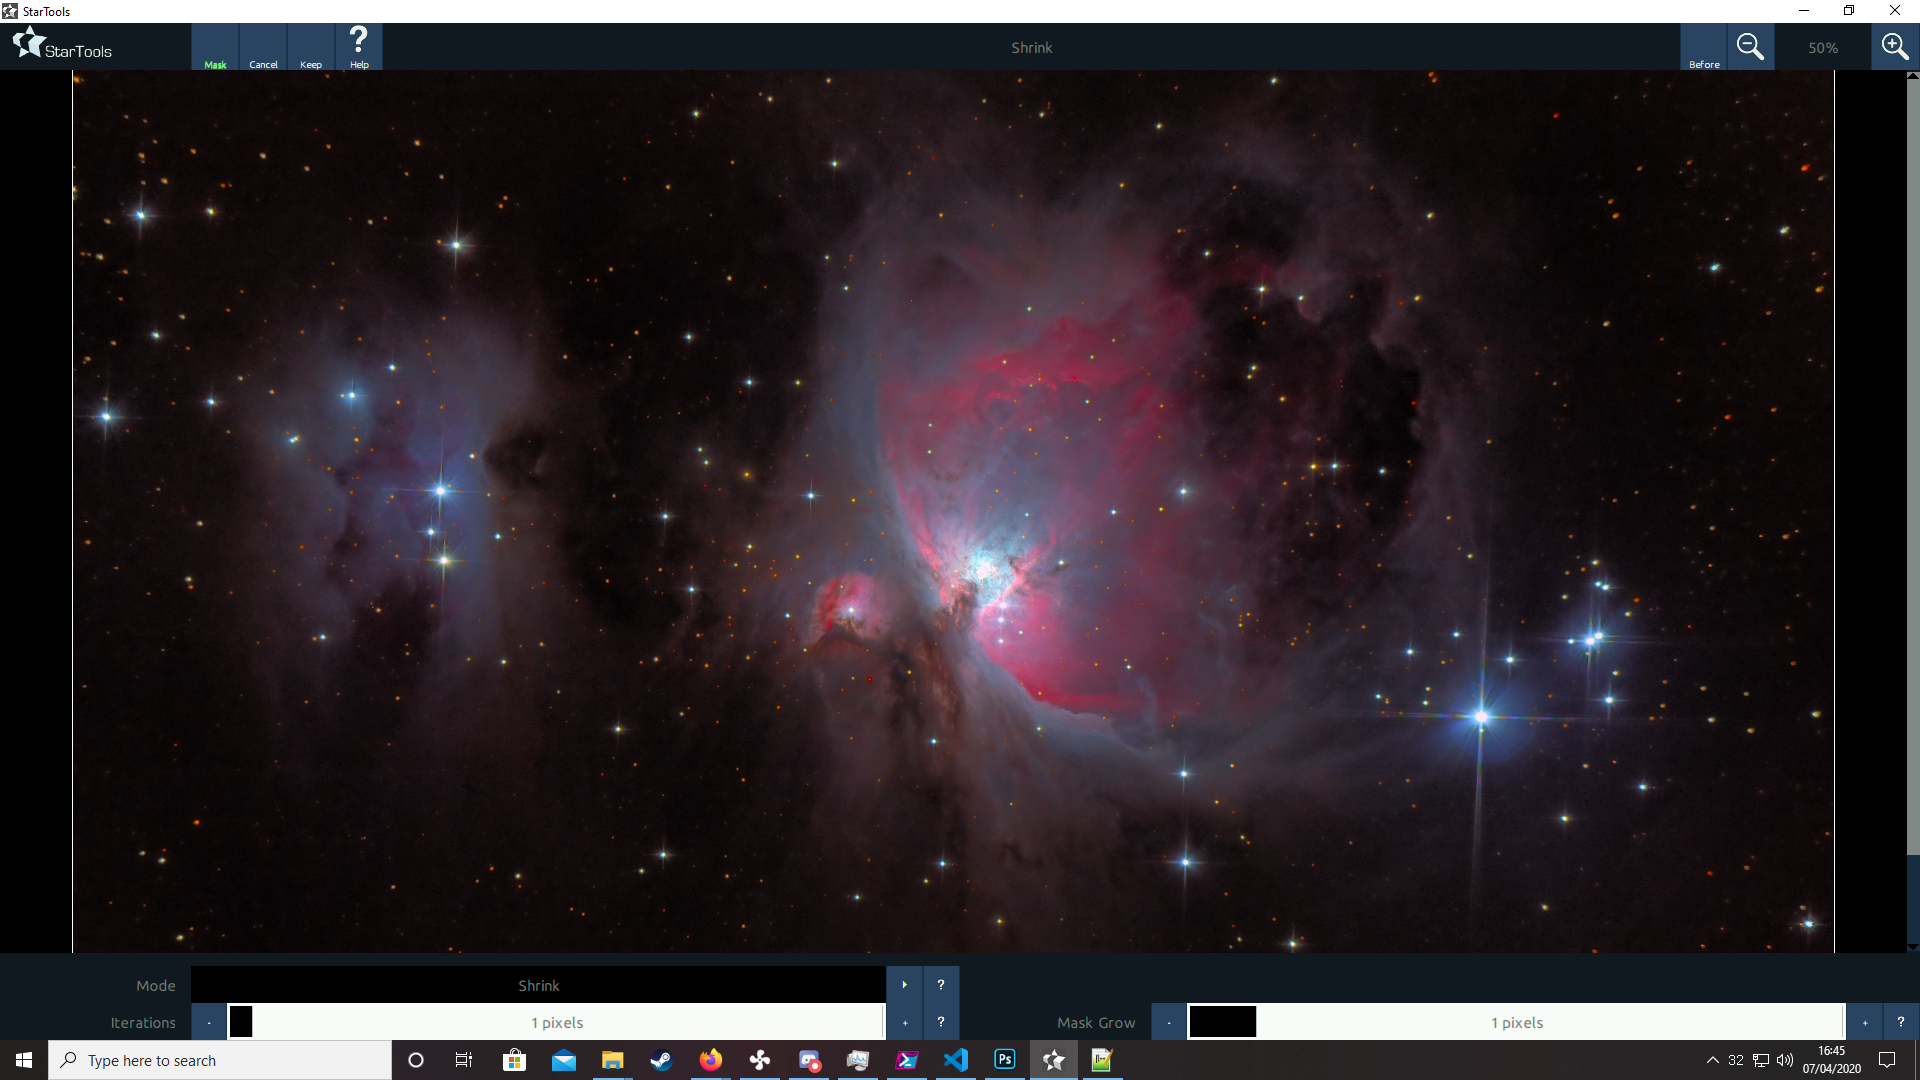
Shrink
Another optional module after Flux is the ability to bring stars down within the image to create a balance between bright stars and more subtle nebulae or galaxy structures. This is largely personal taste and has an effect on the overall 'feel' or compostition of the image.
First of all an Auto Star Mask is created or an earlier mask loaded and reused.

In the next three images the effect of no shrinking of stars, a one pixel shrink and a three pixel shrink can be seen on the image.


Saving
Optionally some of the other modules can be run on the image depending on goals or problems that may need fixing but details for all these can be found in the documentation.
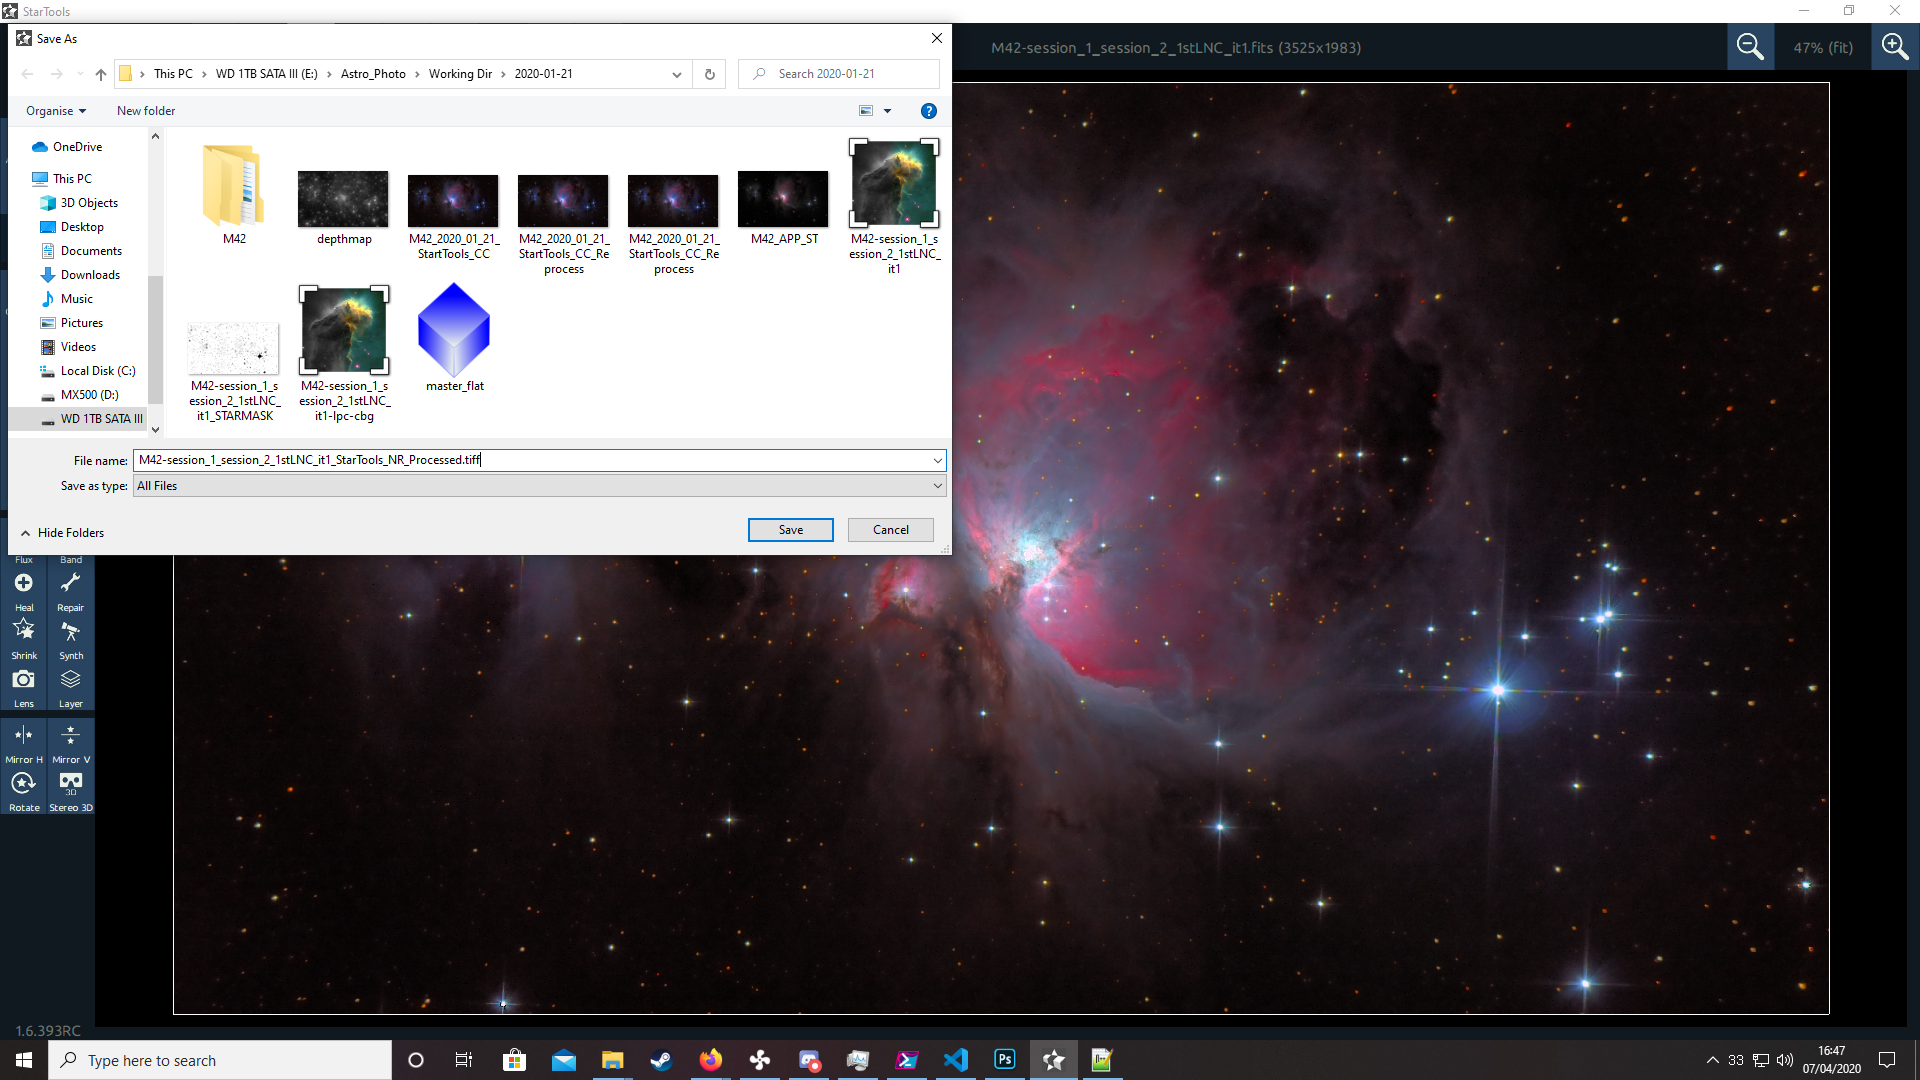
All that's left is to save the image as a .TIFF to retain a fully uncompressed source file for further work or final publishing as PNG or JPEG later on.
Final Tweaks
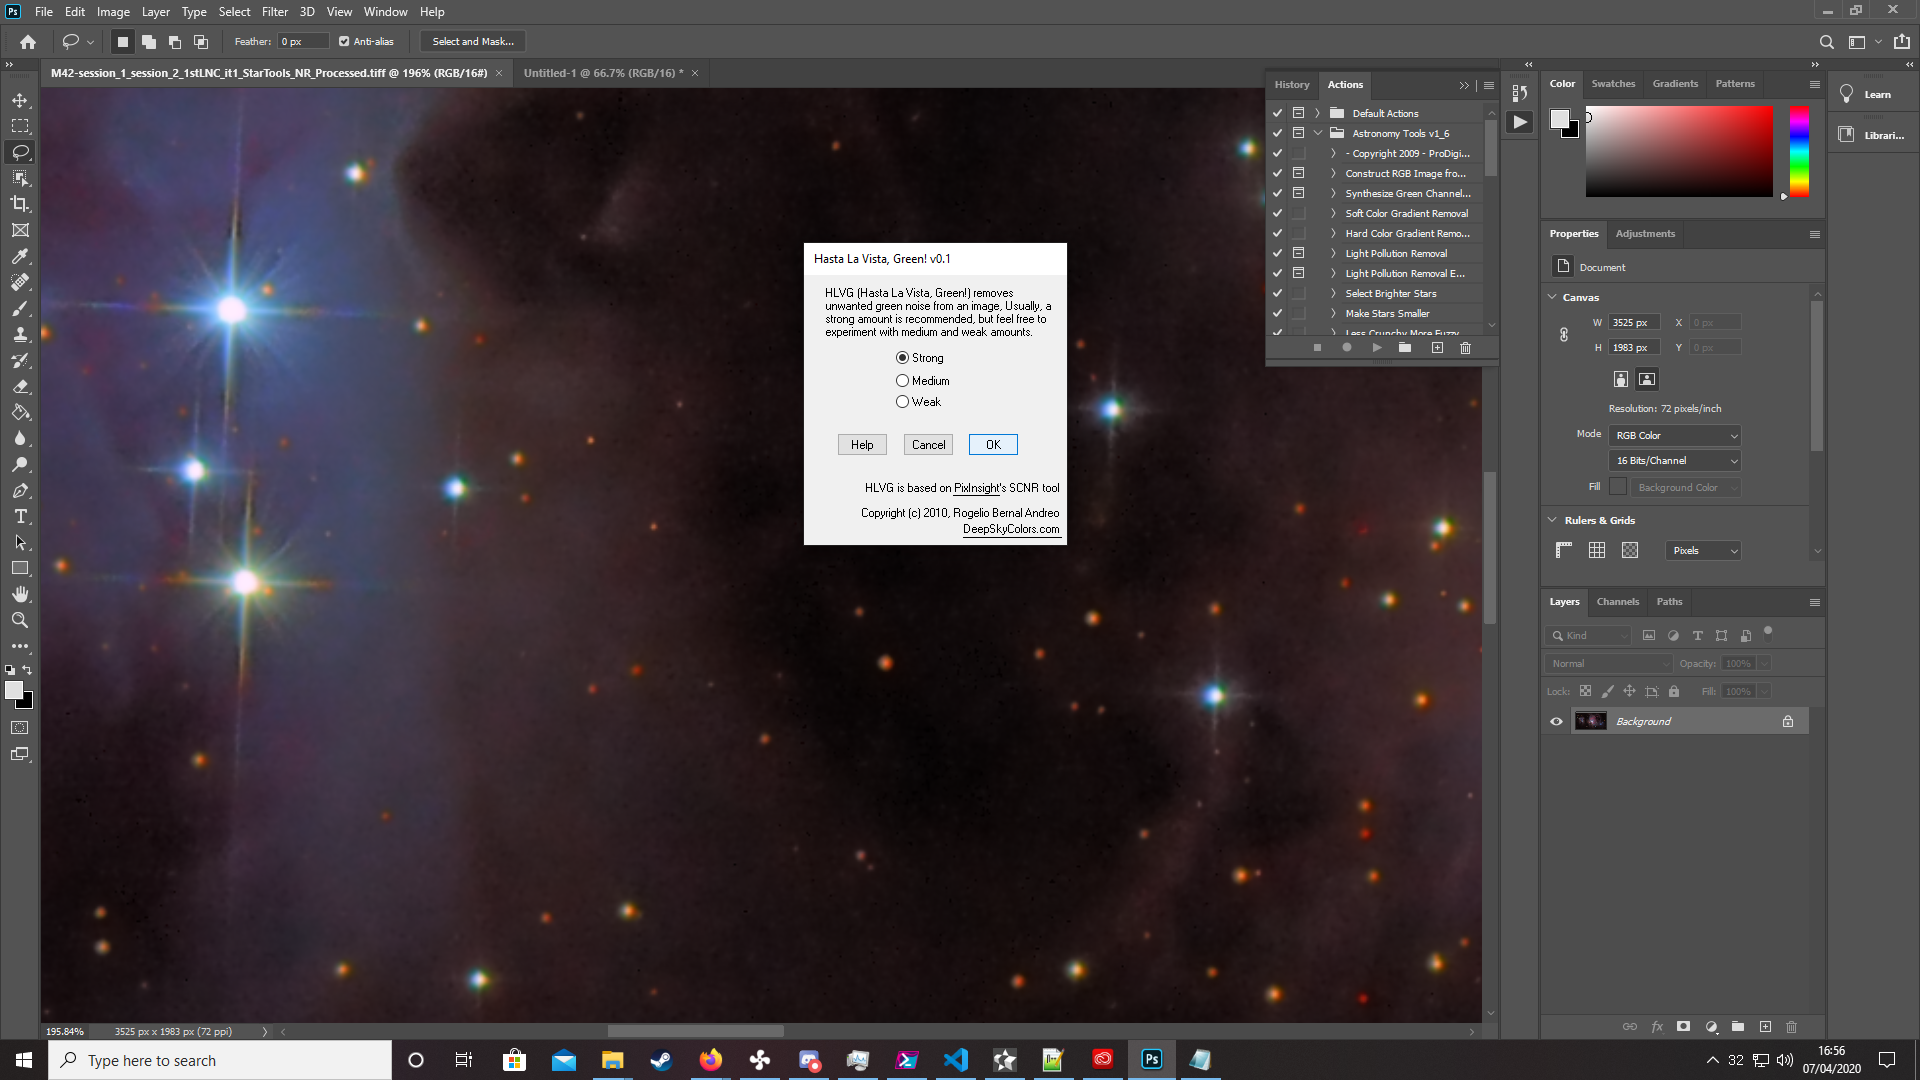
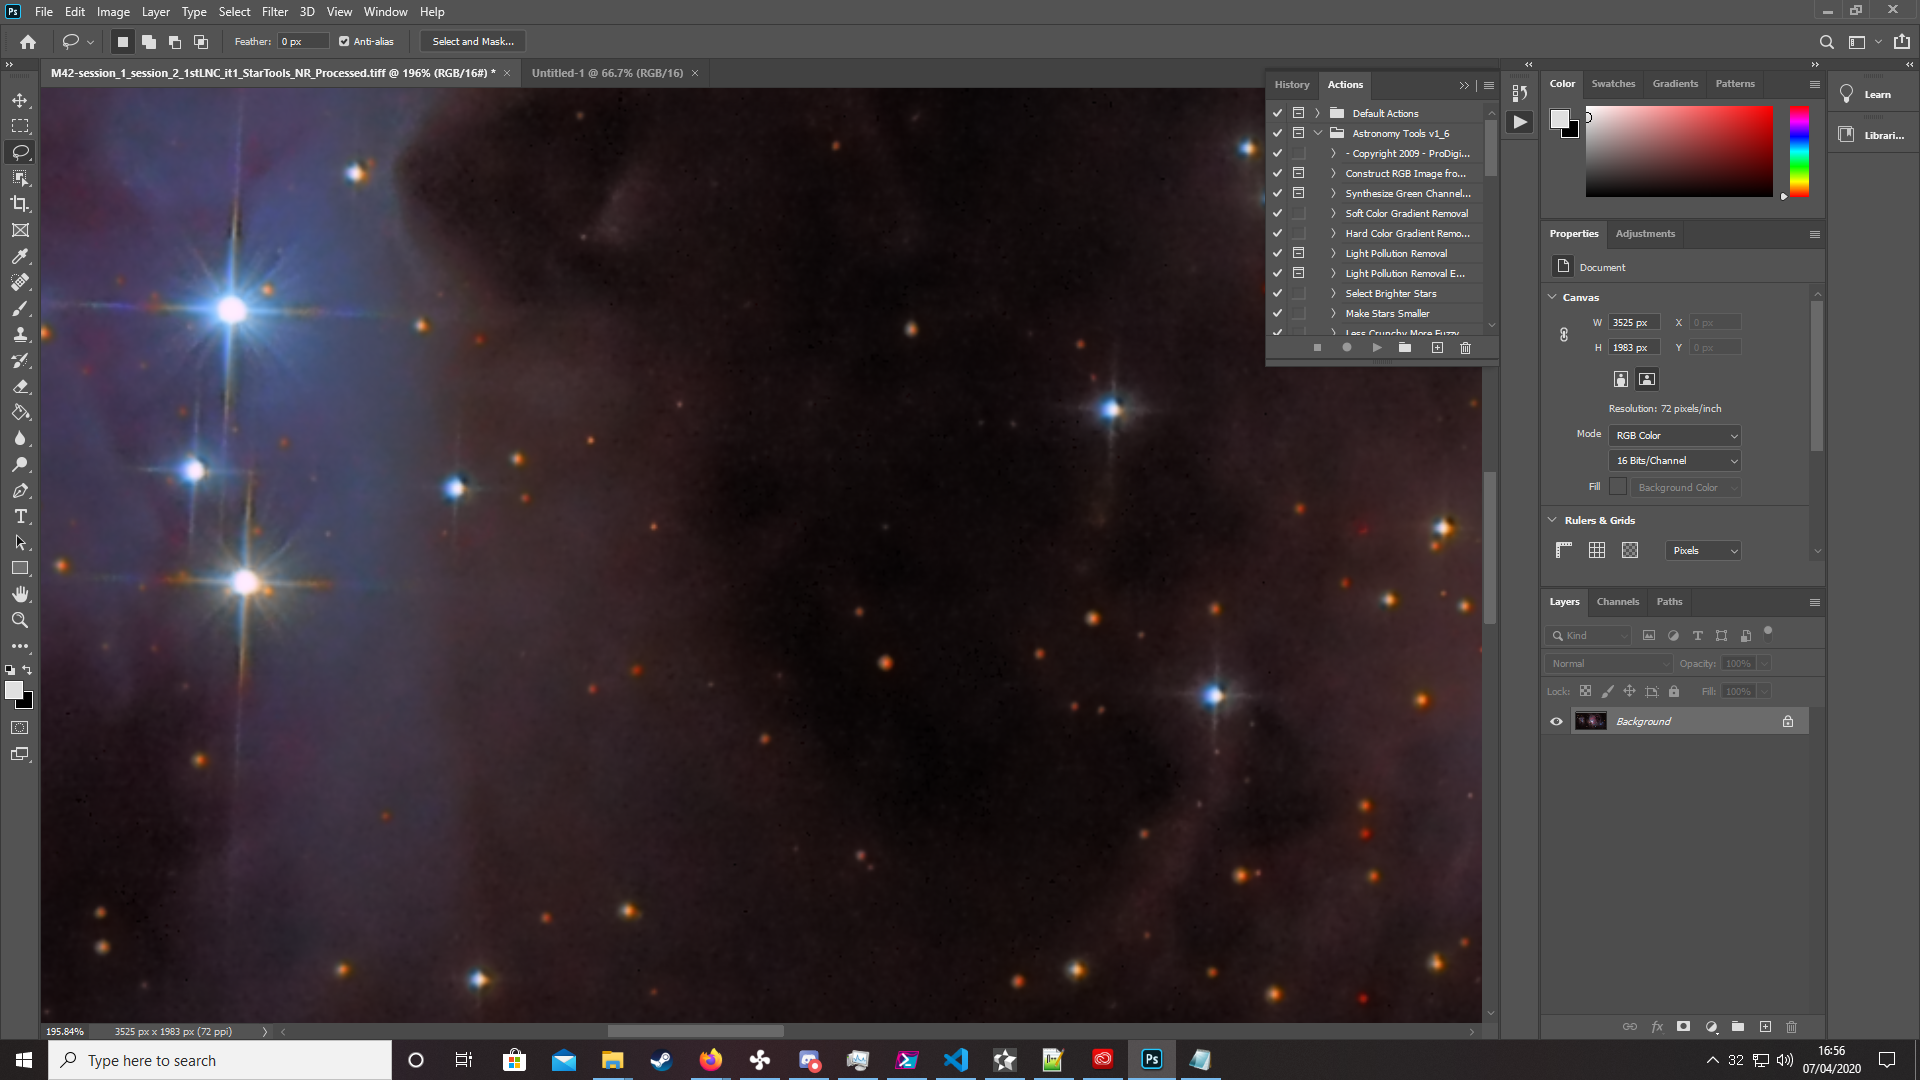
Another optional step but one I always do is to bring the final image into Photoshop and perform a final green reduction using Hasta La Vista Green plugin for Photoshop or some equivalent alternative such as that in Siril.
This step removes the final green cast from the image that may remain after colour balancing. Here you can see 'Strong' removal before and after and the effect on a bright star with prominent green cast and diffraction spikes.
After this a final tweak to overall curves and colour balance as well as further sharpening and noise reduction can be done in Photoshop to achieve the final result. In this example a simple and subtle S-Curve is introduced as an adjustment layer to create final depth and contrast in the image as well as reduce the background further.
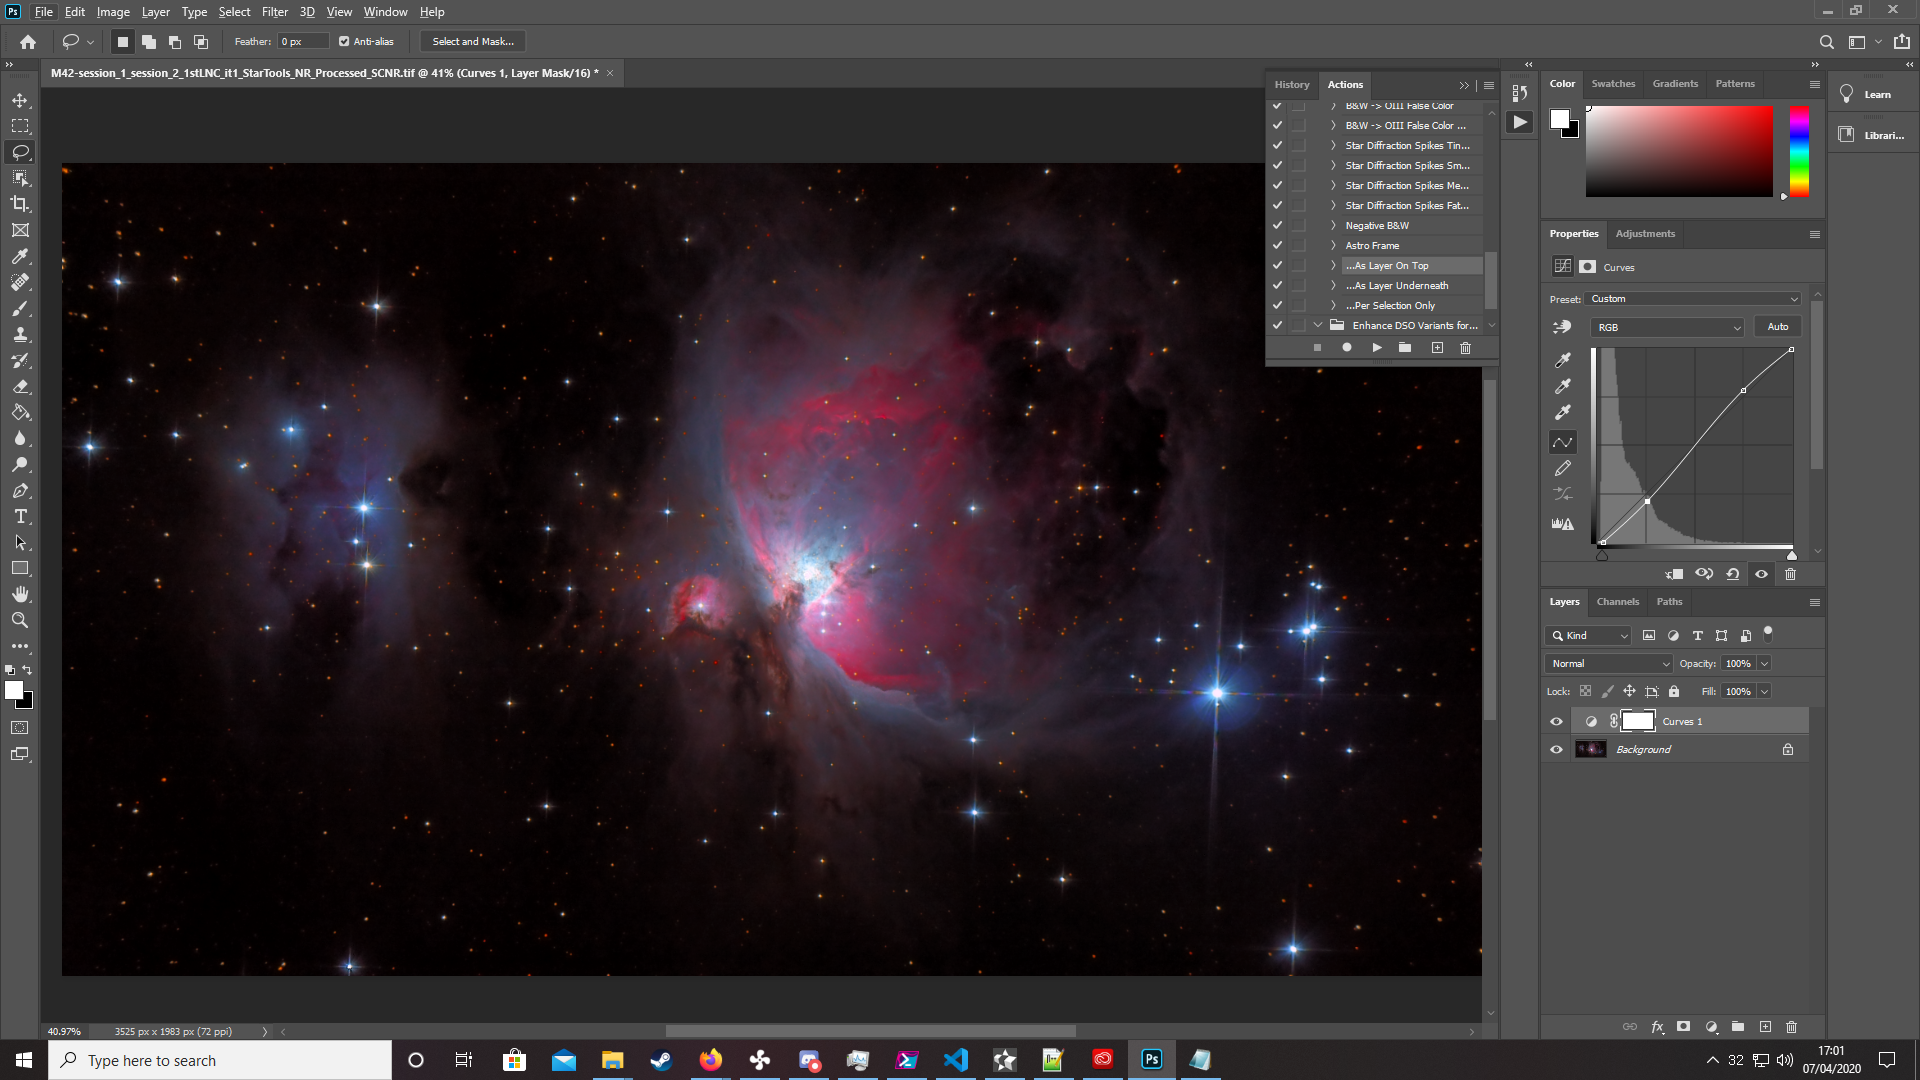
The Final Image
